Month: March 2026

hobart 210mvp manual

Hobart 210MVP Manual: A Comprehensive Guide

This manual details the Hobart 210MVP arc welding power source and wire feeder‚ covering MIG (GMAW) and Flux Cored (FCAW) processes.

The Hobart 210MVP is a versatile and powerful arc welding machine designed for both home and professional use. This manual provides essential information regarding its safe operation‚ setup‚ and maintenance. It’s crucial to thoroughly understand the contents before utilizing the equipment. The 210MVP supports both MIG (GMAW) and Flux Cored (FCAW) welding techniques‚ offering flexibility for various projects and materials.

This guide details symbol usage‚ arc welding hazards‚ and important safety standards. It also includes information on electromagnetic fields (EMF) and California Proposition 65 warnings. Proper understanding of these aspects ensures a safe and productive welding experience. Refer to Section 2 for safety consignes‚ specifically addressing installation‚ operation‚ and maintenance procedures.

Safety Precautions and Symbols

Prior to operating the Hobart 210MVP‚ carefully review all safety precautions and understand the meaning of all symbols used on the machine and within this manual. These symbols alert the user to specific hazards and necessary actions to prevent injury. Familiarize yourself with potential arc welding hazards‚ including electric shock‚ fumes‚ and burns.

Pay close attention to additional symbols related to installation‚ operation‚ and maintenance. Adherence to these guidelines is paramount for safe operation. Be aware of California Proposition 65 warnings regarding potential exposure to hazardous substances. Always follow principal safety standards to minimize risks and ensure a secure working environment.
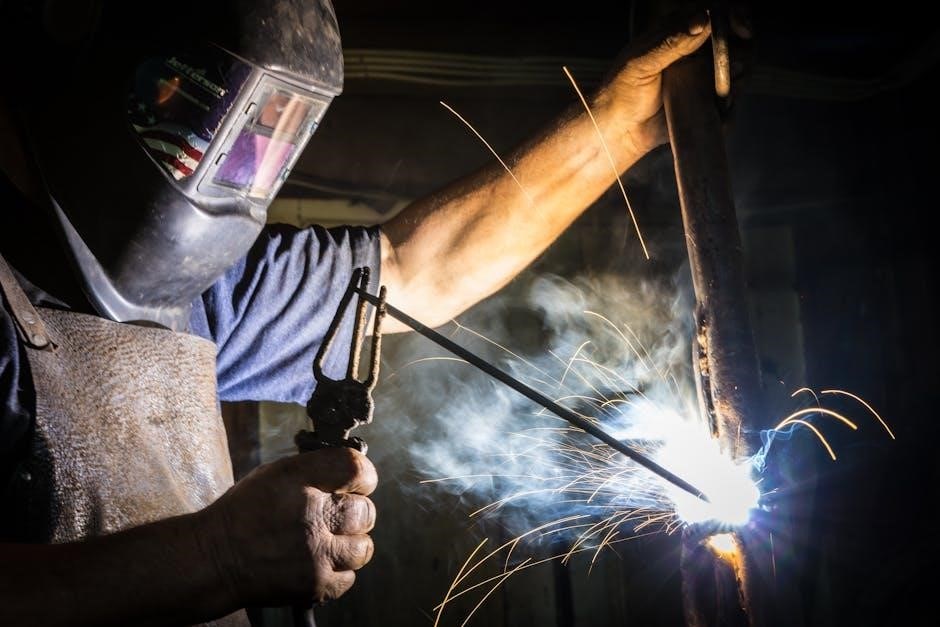
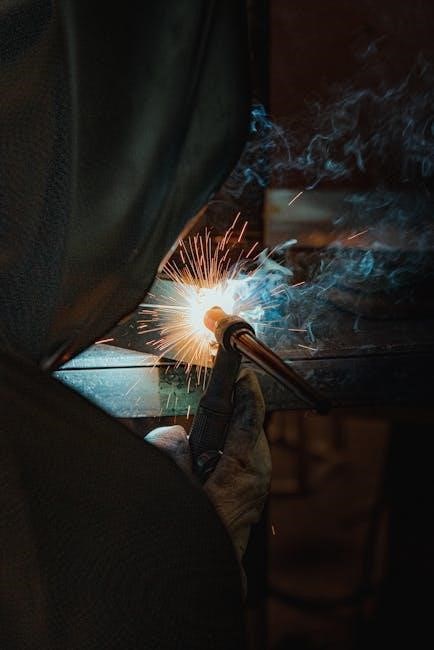
Arc Welding Hazards

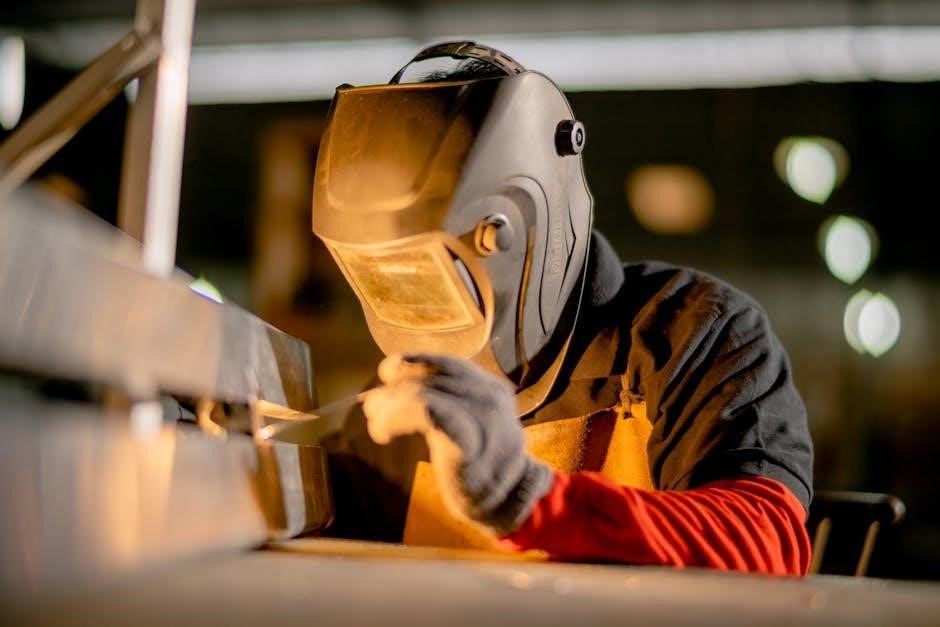
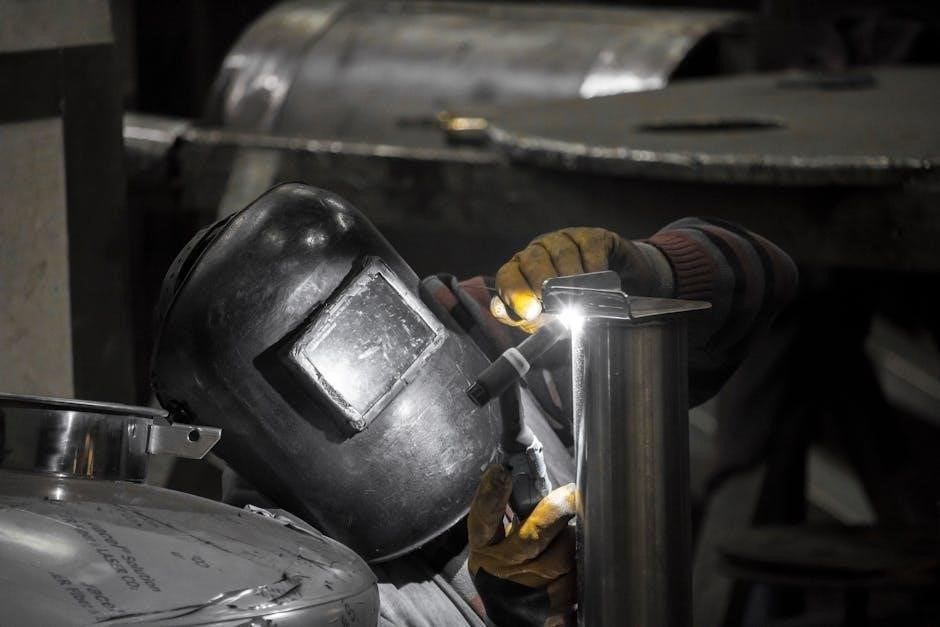
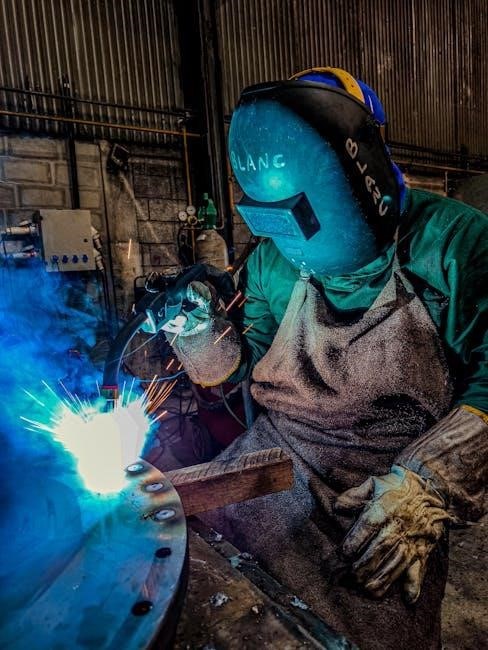
Arc welding presents significant hazards demanding strict adherence to safety protocols. Electric shock is a primary concern‚ potentially causing severe injury or fatality; always ensure proper grounding and insulation. Welding fumes and gases can be harmful to breathe‚ necessitating adequate ventilation or respiratory protection. Intense ultraviolet radiation from the arc can damage eyes and skin‚ requiring appropriate shielding.

Burns are also a risk from hot metal‚ sparks‚ and spatter. Fire and explosion hazards exist due to flammable materials in the work area. Be mindful of noise levels and potential exposure to electromagnetic fields (EMF). Prioritize personal protective equipment (PPE) and a safe working environment.

Additional Safety Symbols

Beyond standard warnings‚ specific symbols highlight installation‚ operation‚ and maintenance hazards. A symbol indicating a risk of electric shock emphasizes the need for disconnection before servicing. Another warns against touching electrically live parts‚ reinforcing electrical safety. Symbols denoting potential for burns caution against contact with hot surfaces or sparks.

Symbols related to gas cylinders highlight proper handling and storage procedures. Further symbols may indicate risks associated with moving parts or specific maintenance tasks. Understanding these symbols is crucial for safe operation and preventing accidents. Always consult the manual for detailed explanations of each symbol’s meaning.

California Proposition 65 Warnings

California’s Proposition 65 requires warnings about exposures to substances known to cause cancer‚ birth defects‚ or other reproductive harm. Welding processes‚ including those utilizing the Hobart 210MVP‚ can produce fumes and particles containing such substances. These may include metals like lead‚ cadmium‚ and nickel‚ as well as welding fumes themselves.

Exposure to these substances can occur during welding‚ grinding‚ or cutting operations. It’s vital to use adequate ventilation‚ wear appropriate respiratory protection‚ and follow safe handling practices to minimize exposure. Refer to the safety data sheets (SDS) for specific materials used and consult California’s Proposition 65 resources for further information.

Principal Safety Standards

The Hobart 210MVP adheres to several principal safety standards to ensure operator well-being and equipment longevity. These standards encompass electrical safety‚ arc welding hazard prevention‚ and proper machine operation. Key standards include those set forth by the American National Standards Institute (ANSI) and the International Electrotechnical Commission (IEC) regarding welding equipment safety.

Compliance involves proper grounding‚ insulation‚ and protective measures against electric shock. Adhering to these standards minimizes risks associated with arc radiation‚ fumes‚ and potential mechanical hazards. Always consult the complete safety section of this manual and relevant industry guidelines for detailed information and best practices.

Electromagnetic Fields (EMF) Information

Arc welding processes generate electromagnetic fields (EMF). The Hobart 210MVP‚ like all arc welding equipment‚ produces EMF during operation. While the health effects of EMF are still debated‚ individuals with pacemakers or other implanted medical devices should exercise caution and consult their physician before operating or working near this equipment.

Maintaining a safe working distance and following recommended practices can help minimize EMF exposure. Further research is ongoing to better understand the potential long-term effects of EMF. Always prioritize safety and consult relevant health guidelines.

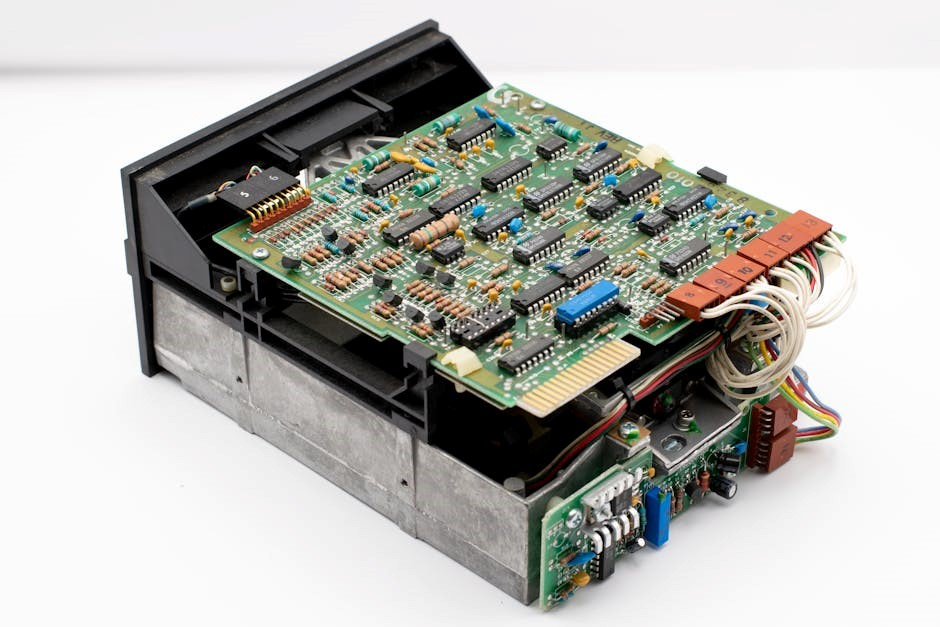
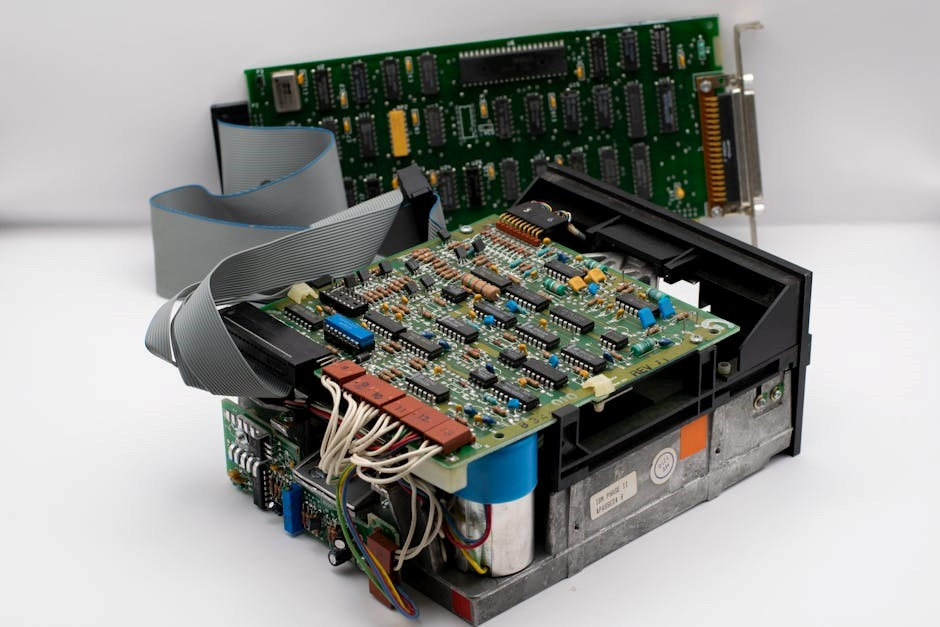
Understanding the 210MVP Components

The 210MVP consists of a power source‚ wire feeder‚ gas delivery system‚ and welding gun/cables‚ all working together for optimal performance.

Power Source Overview

The Hobart 210MVP power source is designed for both MIG (GMAW) and Flux Cored (FCAW) arc welding applications. It delivers consistent and reliable power for a variety of materials and thicknesses. This unit features advanced inverter technology‚ providing a stable arc and excellent weld quality. Understanding its capabilities is crucial for safe and effective operation. The power source incorporates various safety features‚ including overload protection and thermal shutdown‚ ensuring longevity and operator safety. Proper ventilation is essential during operation to prevent overheating. Regular inspection of the power cables and connections is recommended to maintain optimal performance and prevent electrical hazards. The unit’s compact design enhances portability and ease of use in diverse welding environments.

Wire Feeder Details

The Hobart 210MVP’s integrated wire feeder ensures smooth and consistent wire delivery during welding operations. It accommodates various wire diameters‚ offering versatility for different welding applications. Maintaining proper wire tension is critical for stable arc performance and minimizing issues like bird nesting. The drive rolls must match the wire type and diameter being used. Regular cleaning of the wire feeder assembly prevents dust and debris buildup‚ which can cause feeding problems. Inspecting the feeder motor and gears for wear is also important for reliable operation. Proper wire spool installation and securing are essential to prevent erratic feeding. Understanding these details ensures optimal welding performance and minimizes downtime.

Gas Delivery System

The Hobart 210MVP utilizes a gas delivery system to shield the weld pool from atmospheric contamination‚ crucial for high-quality welds. This system requires a properly installed and secured gas cylinder‚ along with a regulator to control gas flow. Inspecting the gas hose for leaks or damage before each use is paramount for safety and consistent performance. The correct gas type – typically argon or a mixed gas – must be selected based on the welding process and material.
Maintaining a consistent gas flow rate is vital for adequate shielding. Purging the gas line before welding removes contaminants and ensures a clean weld.

Welding Gun and Cables

The Hobart 210MVP’s welding gun and cables are essential components for transferring welding current and shielding gas to the weld area. Regularly inspect the gun for wear‚ including the contact tip‚ nozzle‚ and diffuser‚ replacing them as needed to maintain optimal performance. Ensure the cable connections are clean and tight to prevent voltage drops and erratic arc behavior.
Proper cable routing prevents damage and ensures smooth operation. The gun’s trigger should operate smoothly‚ and the liner should be free of obstructions. Always disconnect the welding gun from the power source when performing maintenance or replacement of parts.

Setting Up the 210MVP

Proper setup involves grounding‚ gas cylinder installation‚ and wire installation with correct tension adjustment for optimal welding performance and safety.

Initial Setup and Grounding

Before operation‚ ensure the Hobart 210MVP is connected to a suitable power source‚ adhering to local electrical codes and regulations. A properly grounded system is crucial for operator safety and equipment longevity.

Connect the work cable securely to the workpiece‚ ensuring a clean and tight connection to minimize resistance. Verify the grounding clamp is firmly attached to a clean metal surface.

Inspect all cables for damage before each use‚ replacing any frayed or cracked wires immediately. Proper grounding diverts stray currents‚ reducing the risk of electric shock and electromagnetic interference.

Double-check all connections before initiating the welding process‚ prioritizing a safe and stable electrical pathway.

Gas Cylinder Installation

When installing a gas cylinder for use with the Hobart 210MVP‚ prioritize safety and follow established procedures. Securely fasten the cylinder in an upright position using a chain or strap to prevent accidental tipping.

Utilize a regulator specifically designed for the shielding gas being used‚ ensuring compatibility with the cylinder valve. Inspect the regulator and hose for leaks before each use‚ employing a soapy water solution to detect bubbles.

Slowly open the cylinder valve‚ monitoring the regulator pressure gauge to achieve the desired flow rate. Never force the valve open‚ and always close it tightly when not in use.

Wire Installation and Tension Adjustment

Proper wire installation is crucial for consistent welding with the Hobart 210MVP. Begin by ensuring the power is off before loading the wire spool onto the feeder hub‚ aligning it correctly.

Thread the wire through the drive rolls and guide tube‚ following the designated path. Adjust the drive roll tension to match the wire type and diameter‚ preventing slippage or deformation.

Feed the wire through the welding gun until it emerges at the contact tip. Fine-tune the tension adjustment knob to maintain consistent wire feed without buckling or bird-nesting.

Welding Parameters and Techniques

This section outlines optimal settings for MIG (GMAW) and Flux Cored (FCAW) welding‚ alongside troubleshooting for common issues encountered during operation.

MIG (GMAW) Welding Settings

Achieving optimal results with the Hobart 210MVP’s MIG (GMAW) process requires careful parameter selection. Voltage‚ wire feed speed‚ and gas flow are crucial. Typically‚ for mild steel‚ a voltage range of 17-24V is a good starting point‚ adjusted based on material thickness. Wire feed speed correlates directly with amperage; thicker materials demand higher speeds. Argon/CO2 gas mixtures (75/25 or 90/10) are commonly used‚ with flow rates between 20-30 cubic feet per hour.

Proper technique involves maintaining a consistent travel speed and work angle. Short-arc welding is generally preferred for thinner materials‚ while a longer arc is suitable for thicker sections. Regularly inspect the weld pool for proper penetration and fusion. Adjust parameters incrementally to fine-tune the weld characteristics and minimize defects like porosity or lack of fusion.

Flux Cored (FCAW) Welding Settings

The Hobart 210MVP excels in Flux Cored (FCAW) applications‚ offering high deposition rates and suitability for outdoor welding. FCAW settings differ from MIG; voltage typically ranges from 19-26V‚ depending on the wire diameter and joint configuration. Wire feed speed is again key to amperage control‚ requiring adjustment based on material thickness and desired penetration.

Self-shielded FCAW wires require no external gas‚ while gas-shielded wires utilize CO2 or Argon/CO2 mixtures. Gas flow rates‚ when applicable‚ should be around 25-35 cubic feet per hour. Maintain a slight drag angle and consistent travel speed. FCAW produces more spatter than MIG‚ so appropriate shielding and cleanup are essential. Monitor slag removal for complete fusion.

Troubleshooting Common Welding Issues

Common issues with the Hobart 210MVP include erratic wire feed‚ inconsistent arc‚ and porosity. Erratic feed often stems from a dirty drive roll or insufficient wire tension – inspect and adjust accordingly. An unstable arc can indicate incorrect voltage or polarity; verify settings for the chosen process and material.

Porosity‚ characterized by holes in the weld‚ frequently results from contamination (rust‚ oil) or inadequate shielding gas coverage. Ensure clean base metal and proper gas flow. Check for worn contact tips and nozzles. If problems persist‚ examine the ground clamp connection and power cable integrity. Always consult the manual for detailed diagnostics.

Maintenance and Repair

Regular cleaning‚ inspection‚ and adherence to the routine maintenance schedule are crucial for optimal Hobart 210MVP performance and longevity.

Routine Maintenance Schedule

To ensure the Hobart 210MVP operates reliably‚ a consistent maintenance schedule is essential. Daily checks should include inspecting welding cables for damage‚ verifying gas cylinder pressure‚ and cleaning the welding gun nozzle. Weekly‚ examine the wire feed rollers for wear and clean the drive assembly.

Monthly maintenance involves a thorough inspection of the power source cooling system (if applicable)‚ checking all electrical connections for tightness‚ and cleaning the exterior of the machine. Annually‚ it’s recommended to have a qualified technician inspect the internal components and perform any necessary repairs or replacements.

Proper maintenance extends the lifespan of your 210MVP and minimizes downtime‚ contributing to consistent welding quality and operational efficiency.

Cleaning and Inspection Procedures

Regular cleaning is vital for the Hobart 210MVP’s performance. Disconnect power before any inspection or cleaning. Use compressed air to remove dust and debris from the wire feeder‚ gun‚ and power source vents. Inspect welding cables for cracks or fraying‚ replacing them if damaged.

Check the gas nozzle for spatter buildup and clean it regularly. Examine the wire feed rollers for wear and smooth operation‚ cleaning or replacing as needed. Visually inspect all electrical connections for corrosion or looseness‚ tightening them securely.

A clean machine operates cooler and more efficiently‚ preventing potential issues and extending its lifespan.

Parts List and Ordering Information

To ensure proper maintenance and repair of your Hobart 210MVP‚ a comprehensive parts list is essential. Contact an authorized Hobart distributor or visit the official Hobart Welders website (www.hobartwelders.com) for detailed parts diagrams and ordering information.

When ordering‚ always have the model number (210MVP) and serial number of your unit readily available. This ensures you receive the correct replacement parts. Common replacement parts include welding tips‚ contact tips‚ nozzles‚ wire feed rollers‚ and welding cables.

Genuine Hobart parts are recommended for optimal performance and warranty coverage.

traxxas tq transmitter manual

Traxxas TQ Transmitter Manual: A Comprehensive Guide

This manual provides detailed instructions for the Traxxas TQ transmitter, assisting users in setup, operation, and customization of their RC vehicle control system.

It covers everything from initial binding to advanced settings, ensuring optimal performance and a tailored driving experience for Traxxas enthusiasts.

The Traxxas TQ transmitter is a cornerstone of the Traxxas experience, renowned for its reliable performance and user-friendly design. This transmitter serves as the vital link between the driver and their RC vehicle, translating commands into precise movements.

Designed for both beginners and experienced RC enthusiasts, the TQ offers a balance of simplicity and advanced features. It’s engineered to deliver consistent control and responsiveness, enhancing the overall driving experience.

This guide will walk you through the TQ’s capabilities, from basic operation to advanced customization options. Understanding the TQ’s features will unlock the full potential of your Traxxas vehicle, allowing for precise control and exhilarating fun. Welcome to a deeper dive into the world of Traxxas RC control!

Understanding the TQ Transmitter Features

The Traxxas TQ transmitter boasts a range of features designed for optimal RC control. Key components include adjustable steering and throttle trims, allowing for precise calibration to your vehicle and driving style. The transmitter also features channel selection, enabling compatibility with various Traxxas models.

Advanced features like Endpoint Adjustment (EPA) and exponential settings provide further customization, tailoring the control sensitivity to your preferences. Dual Rate settings offer enhanced control for different driving scenarios.

The TQ’s ergonomic design ensures comfortable handling during extended use, while its durable construction guarantees long-lasting reliability. Understanding these features is crucial for maximizing your RC experience and achieving precise control over your Traxxas vehicle.

Getting Started with Your TQ Transmitter

Begin by powering on the transmitter and binding it to your Traxxas vehicle. Adjust steering and throttle trims for precise control and optimal performance.

Initial Setup and Powering On

Before your first use, carefully inspect the TQ transmitter for any visible damage. Ensure the battery compartment is securely closed. To power on, locate the power switch – typically found on the front or side of the transmitter – and slide it to the ‘ON’ position.

The transmitter’s LED indicator will illuminate, confirming it’s receiving power. If the LED doesn’t light, verify the batteries are correctly installed and have sufficient charge. It’s recommended to use fresh alkaline batteries for optimal performance. Familiarize yourself with the location of key controls, like the steering wheel and throttle trigger, before proceeding to the binding process.

Always power off the transmitter when not in use to conserve battery life.

Binding the Transmitter to Your Traxxas Vehicle

Binding establishes a unique connection between your TQ transmitter and your Traxxas vehicle’s receiver. Begin by ensuring your vehicle is powered on. Then, activate binding mode on the transmitter – typically by pressing and holding the SET button while powering it on.

The transmitter’s LED will blink rapidly, indicating it’s in binding mode. Simultaneously, activate the binding procedure on your vehicle’s receiver, following the instructions in your vehicle’s manual. Once the receiver and transmitter successfully connect, the LED on both will become solid.

A successful bind is crucial for reliable control. If binding fails, repeat the process, ensuring both devices are close to each other and free from interference.

Adjusting Steering and Throttle Trims

Steering and throttle trims fine-tune your vehicle’s response, compensating for mechanical imperfections or desired driving preferences. Use the steering trim dial to adjust the neutral point of the steering servo, correcting for unwanted turning when the wheel is centered.

Similarly, the throttle trim adjusts the neutral point of the throttle, ensuring the vehicle doesn’t creep forward or backward when the trigger is released. Small adjustments can significantly improve handling and control.

Observe your vehicle’s behavior and make incremental changes until it responds predictably and accurately. Proper trim settings are essential for consistent performance and preventing unintended movements.

Transmitter Controls and Functions

The Traxxas TQ transmitter features intuitive controls for steering, throttle, and channel selection, providing precise command over your RC vehicle’s movements and functions.

Steering Control Explained

The steering control on the Traxxas TQ transmitter dictates the left and right movement of your RC vehicle. Typically, it’s a single stick or wheel, offering responsive and accurate directional control. Understanding its nuances is crucial for precise maneuvering.

The stick’s range of motion directly correlates to the steering angle of the vehicle’s wheels. Moving the stick fully to the left results in maximum left steering, while moving it fully to the right achieves maximum right steering.

Steering trim adjustments allow for fine-tuning, compensating for slight imperfections in the steering linkage or track conditions. Endpoint adjustments (EPA) further refine the steering range, preventing oversteering or limiting steering throw as needed. Mastering these controls ensures optimal handling and responsiveness.

Throttle Control Explained

The throttle control on the Traxxas TQ transmitter manages the speed and acceleration of your RC vehicle. Usually a trigger-style control, it dictates how much power is sent to the motor, influencing both forward and reverse motion.

Pulling the trigger progressively increases speed, while releasing it slows the vehicle down. Fully depressing the trigger delivers maximum forward speed, while pushing it forward (if equipped with reverse) engages reverse gear.

Throttle trim adjustments are vital for calibrating the neutral point, ensuring the vehicle doesn’t creep forward or backward unintentionally. Exponential settings modify the throttle curve, offering finer control at low speeds and maintaining responsiveness at higher speeds. Proper throttle control is key to smooth acceleration and precise speed management.

Channel Selection and Usage

The Traxxas TQ transmitter typically operates on a 2.4GHz frequency, offering interference-free operation and allowing multiple RC vehicles to run simultaneously in the same area. Channel selection isn’t usually a manual process with modern TQ systems; the transmitter automatically selects the best available channel during the binding process.

However, understanding channel functionality is crucial for advanced setups. Some TQ transmitters may offer auxiliary channels, controllable via switches or dials, for managing additional functions like lights, winches, or gear shifting.

Proper channel assignment ensures these features operate as intended. Refer to your vehicle’s manual for specific channel mapping recommendations. Maintaining a strong signal and avoiding interference are paramount for reliable control.

Advanced TQ Transmitter Settings

Unlock your TQ’s full potential with customizable endpoints, exponential curves, and dual rates. These settings refine steering and throttle response for precise control and personalized driving.

Adjusting Endpoints (EPA)

Endpoint Adjustment (EPA) allows you to limit the maximum steering and throttle range. This is crucial for preventing oversteering or overpowering your vehicle, especially with high-performance motors or sensitive servos. Access the EPA settings through the transmitter’s menu system – typically involving navigating through channels and adjustment options.

Reducing the EPA value limits the maximum travel. For example, lowering the steering EPA prevents the wheels from turning as sharply, offering more controlled handling. Similarly, reducing throttle EPA limits the maximum speed. Carefully adjust these values in small increments, testing the vehicle’s response after each change.

EPA is particularly useful for fine-tuning control on different terrains. Lower EPA settings are ideal for tight spaces or slippery surfaces, while higher settings provide maximum responsiveness on open tracks. Always prioritize safety and control when adjusting EPA values.

Exponential Settings for Steering and Throttle

Exponential (Expo) settings modify the relationship between stick movement and vehicle response. Unlike linear control, Expo provides a curved response – small stick movements result in small changes, while larger movements yield increasingly significant effects. This is beneficial for both steering and throttle control.

Increasing steering Expo makes the vehicle less sensitive around the center, improving precision and preventing accidental oversteering. Higher throttle Expo offers finer control at low speeds and more aggressive acceleration as the trigger is pressed further. Adjusting Expo is found within the transmitter’s menu system.

Experiment with different Expo values to find what suits your driving style and vehicle. Start with small adjustments and test the response. Expo is a powerful tool for customizing control feel and maximizing performance on various terrains.

Dual Rate Settings for Enhanced Control

Dual Rate (D/R) settings allow you to adjust the maximum steering and throttle output independently. This feature provides enhanced control by limiting the full range of motion, offering a milder driving experience or increased precision. It’s particularly useful for beginners or when navigating tight spaces.

Reducing steering D/R lowers the maximum steering angle, making the vehicle less responsive and easier to control. Lowering throttle D/R limits maximum acceleration, preventing wheelspin and improving control on slippery surfaces. These adjustments are typically accessed through the transmitter’s menu.

Dual Rate is ideal for adapting to different driving conditions and skill levels. Experiment with various settings to find the optimal balance between control and responsiveness. It’s a valuable tool for fine-tuning your driving experience and maximizing vehicle performance.

Calibration and Troubleshooting

This section details procedures for calibrating throttle and steering, resolving common issues like binding or limited range, and restoring factory settings for optimal performance.

Calibrating the Throttle and Steering

Proper calibration ensures accurate control of your Traxxas vehicle. Begin by powering on the transmitter and receiver, then enter the calibration mode – typically accessed through a specific button combination as detailed in your manual.

For throttle calibration, fully depress and release the trigger several times, allowing the transmitter to recognize the full range of motion. The LED indicator will signal successful calibration.

Steering calibration follows a similar process, requiring full left and right steering input. Accurate calibration is crucial for responsive handling and preventing unintended movements. If issues persist, repeat the process carefully, ensuring smooth and complete range of motion for both throttle and steering.

Troubleshooting Common Issues (Binding, Range)

Binding issues often stem from low battery levels in either the transmitter or receiver. Ensure both are fully charged. If problems persist, re-attempt the binding procedure, carefully following the manual’s instructions. Interference from other 2.4GHz devices can also disrupt binding.

Reduced range may indicate antenna problems – verify the transmitter antenna is fully extended and undamaged. Obstructions like buildings or trees can limit range. If range remains poor, check for internal wiring issues within the transmitter or receiver.

Consider relocating to an open area for testing. If issues continue, consult the Traxxas support website or contact their customer service for further assistance.

Resetting the Transmitter to Factory Defaults

Returning your Traxxas TQ transmitter to factory defaults can resolve persistent software glitches or undo unintended settings changes. This process erases all custom configurations, restoring the transmitter to its original, out-of-the-box state.

Typically, this involves a specific button combination held during power-up. Consult your TQ transmitter manual for the exact procedure, as it may vary slightly depending on the model. Be aware that resetting will remove saved profiles and customized settings.

After the reset, you’ll need to re-bind the transmitter to your vehicle and re-configure any desired settings, such as endpoints, exponential, and dual rates. This ensures a clean slate for optimal performance.

TQ Transmitter Maintenance

Regular maintenance ensures longevity and reliable performance. This includes proper battery care, cleaning to remove debris, and protecting the unit from physical damage and moisture.

Battery Management and Replacement

Maintaining optimal battery health is crucial for consistent transmitter performance. Always use the recommended battery type – typically AA alkaline or NiMH rechargeable batteries – as specified in your Traxxas documentation. Avoid mixing old and new batteries, and remove batteries if the transmitter will not be used for an extended period to prevent corrosion;

When battery strength diminishes, replace all batteries simultaneously. Low battery power can lead to reduced signal range and erratic control. For NiMH batteries, utilize a compatible smart charger to prevent overcharging and maximize lifespan. Dispose of used batteries responsibly, following local regulations. Regularly inspect the battery compartment for any signs of corrosion or damage, cleaning as needed.

Cleaning and Storage

Proper cleaning and storage will prolong the life of your Traxxas TQ transmitter. After each use, wipe down the transmitter’s exterior with a soft, dry cloth to remove dirt, dust, and debris. For stubborn grime, lightly dampen the cloth with mild soap and water, ensuring no liquid enters the internal components.

Store the transmitter in a clean, dry environment, away from extreme temperatures and humidity. A dedicated storage case is recommended to protect it from physical damage. Avoid placing heavy objects on top of the transmitter. Regularly check the antenna for any signs of damage and ensure it is securely attached. Proper care ensures reliable operation for years to come.

Protecting the Transmitter from Damage

Safeguarding your Traxxas TQ transmitter is crucial for continued performance. Avoid dropping the transmitter, as internal components are sensitive to impact. Do not expose the transmitter to excessive moisture or liquids; accidental splashes should be immediately wiped dry.

Protect the antenna from bending or breaking, as a damaged antenna significantly reduces range. When transporting the transmitter, use a protective case or bag to shield it from scratches and impacts. Avoid storing the transmitter in direct sunlight or near heat sources. Regular inspection for loose screws or damaged parts can prevent further issues. Careful handling extends the transmitter’s lifespan.

Understanding Traxxas Link Compatibility

Traxxas Link software enhances the TQ transmitter’s capabilities, allowing for customization of settings, saving profiles, and data logging for a personalized RC experience.

Connecting the TQ to Traxxas Link

Establishing a connection between your Traxxas TQ transmitter and the Traxxas Link application unlocks a world of customization and control. This is typically achieved using the Traxxas Link Wireless Module (sold separately), which plugs into your computer’s USB port. Ensure the module is properly installed and recognized by your operating system before proceeding.

Next, power on your TQ transmitter and launch the Traxxas Link software on your computer. The software will guide you through the pairing process, often involving a simple button press on both the transmitter and the wireless module. Once connected, the TQ’s settings will be accessible within the Traxxas Link interface, allowing for detailed adjustments and profile management.

A stable USB connection is crucial for reliable data transfer and real-time adjustments.

Using Traxxas Link for Customization

Traxxas Link software provides extensive customization options for your TQ transmitter, far beyond the basic adjustments possible on the transmitter itself. You can precisely tune endpoints (EPA), adjusting maximum steering and throttle angles to match your driving style and track conditions. Exponential settings allow for finer control at low throttle and steering inputs, enhancing precision.

Dual Rate functionality enables you to switch between different sensitivity levels on the fly, ideal for varying terrain or driving modes. Saving and loading transmitter profiles is a key feature, allowing you to store preferred settings for different vehicles or driving scenarios.

The intuitive interface simplifies complex adjustments, making it accessible to both novice and experienced RC enthusiasts.

Saving and Loading Transmitter Profiles

The Traxxas Link software allows you to save multiple transmitter profiles, a crucial feature for users with several Traxxas vehicles or those who enjoy diverse driving styles. Each profile stores all customized settings – EPA, exponential, dual rates, and even steering and throttle trims – tailored to a specific vehicle or track.

Creating a profile is simple: adjust the settings to your preference and then save them with a descriptive name. Loading a profile instantly recalls these settings, eliminating the need to reconfigure the transmitter each time you switch vehicles or driving conditions.

This feature streamlines the setup process and ensures consistent performance, maximizing your time on the track or trail.

Exploring Software Startup Ideas (Related to RC Control)

Innovative software can enhance the RC experience, including data logging, mobile control apps, and virtual reality simulations for realistic remote control practice.

Software for RC Vehicle Data Logging

Dedicated software solutions can capture and analyze performance data from your Traxxas vehicle, offering valuable insights for tuning and improvement. Imagine a program that interfaces with the TQ transmitter, recording throttle position, steering angles, speed, battery voltage, and even GPS location during runs.

This data could be visualized through graphs and charts, allowing users to identify areas for optimization – perhaps a tendency to oversteer, inefficient throttle control, or battery limitations.

A startup could focus on creating a user-friendly interface for both desktop and mobile platforms, enabling real-time monitoring and post-run analysis. Advanced features might include lap timing, predictive maintenance alerts based on usage patterns, and the ability to share data with other RC enthusiasts for collaborative tuning.

Mobile Apps for Remote Control and Monitoring

A mobile application extending the functionality of the Traxxas TQ transmitter presents exciting possibilities. Imagine controlling your RC vehicle directly from your smartphone or tablet, utilizing the device’s touchscreen for intuitive adjustments and real-time feedback.

The app could mirror the transmitter’s controls, allowing for remote adjustments of steering trim, throttle endpoints, and even driving modes. Beyond control, a monitoring suite displaying vehicle telemetry – speed, battery life, motor temperature – would be invaluable.

A startup could develop a secure connection protocol ensuring reliable communication between the TQ and the mobile device. Features like customizable dashboards, data logging, and social sharing could further enhance the user experience, creating a connected RC community.

Virtual Reality RC Simulation Software

A compelling software startup idea centers around a VR RC simulation leveraging the Traxxas TQ transmitter. This would allow users to experience the thrill of RC driving in a realistic, immersive virtual environment, utilizing their existing transmitter for control.

The software could feature meticulously recreated tracks and terrains, offering diverse driving challenges. Integration with the TQ transmitter would provide authentic handling and feedback, enhancing the sense of realism.

Advanced features could include vehicle customization, multiplayer racing, and even the ability to import real-world track data. This provides a safe and cost-effective way to practice and hone RC driving skills, bridging the gap between virtual and physical RC experiences.

aice marine science textbook pdf

AICE Marine Science Textbook PDF: A Comprehensive Guide (Updated 03/14/2026)

Today’s date is 03/14/2026! Accessing a comprehensive AICE Marine Science textbook PDF is crucial for students; resources like the Student Learner Guide are readily available․

What is AICE Marine Science?

AICE Marine Science, specifically Cambridge AICE Marine Science (code 9693), is a rigorous pre-university course designed to provide a comprehensive understanding of the marine world․ It delves into ocean environments, marine organisms, and the complex interplay of ocean chemistry and physics․

The curriculum emphasizes practical skills, including investigations and data analysis, mirroring university-level scientific methodologies․ Students explore topics like the impact of salinity on freezing points and the significance of floating sea ice for marine life․

Access to a reliable textbook PDF, alongside resources like the Student Learner Guide, is paramount for success․ The course prepares students for further study in marine biology, oceanography, or related fields, fostering critical thinking and scientific inquiry․

The Importance of a Textbook PDF

A readily available AICE Marine Science textbook PDF offers unparalleled convenience and accessibility for students․ Digital access facilitates efficient studying, allowing for easy searching of key terms and concepts․ Features like digital zoom and annotation tools enhance comprehension and note-taking․

Having a PDF version ensures students can study anytime, anywhere, on various devices – laptops, tablets, or smartphones․ It eliminates the need to carry heavy physical textbooks and provides a backup in case of loss or damage․

Furthermore, a PDF integrates seamlessly with online learning platforms, enabling interactive learning experiences․ It’s a cost-effective solution, potentially reducing expenses compared to purchasing physical copies, and ensures students have the most up-to-date information․

Finding the AICE Marine Science Textbook PDF

Locating the PDF involves exploring official Cambridge resources, reputable third-party websites, and online repositories; always verify the PDF’s suitability for the 2025 examination!

Official Cambridge Assessment International Education Resources

Cambridge Assessment International Education is the primary source for legitimate AICE Marine Science materials․ While a direct, freely available PDF of the complete textbook isn’t always provided, they endorse specific coursebooks, like “Marine Science for Cambridge IGCSE Coursebook with Digital Access (2 Years)” published by Cambridge University Press in 2022․

These endorsed publications align perfectly with the syllabus and are designed to prepare students for assessments․ Furthermore, Cambridge offers the AICE Marine Science Student Learner Guide as a PDF download, a valuable companion to the main coursebook․ This guide supports the 9693 Marine Science course and examinations, offering targeted assistance․ Always prioritize resources directly linked to or endorsed by Cambridge for accuracy and syllabus coverage․

Third-Party Websites and Online Repositories

Caution is advised when seeking the AICE Marine Science textbook PDF from third-party websites and online repositories․ While some platforms may offer access, the legality and quality of these sources are often questionable․ Users have reported broken links and inaccessible files, as noted with requests to re-upload previously shared resources․

These sites may host outdated or incomplete versions, potentially hindering exam preparation․ Furthermore, downloading from unofficial sources carries risks of malware or copyright infringement․ While a workbook was previously available for free download as a PDF, its current status is uncertain․ Prioritize official Cambridge resources whenever possible to ensure accurate and reliable study materials․

Checking for Updates and Revisions (2025 Examination Suitability)

Crucially, any textbooks endorsed for the 2025 examinations remain suitable for current use, according to Cambridge Assessment International Education․ However, diligent students should proactively verify if their AICE Marine Science textbook PDF aligns with the latest syllabus updates․

Cambridge University Press publishes updated coursebooks with digital access, such as the “Marine Science for Cambridge IGCSE Coursebook” (2022)․ Regularly check for revised editions or supplementary materials released by official sources․ Confirming the content’s relevance is vital, especially concerning topics like floating sea ice and salinity’s impact on freezing points, ensuring comprehensive preparation for assessments․

Key Components of the AICE Marine Science Curriculum

The curriculum encompasses the ocean environment, marine organisms, and ocean chemistry/physics; a textbook PDF provides structured access to these core components․

The Ocean Environment

Understanding the ocean environment is foundational in AICE Marine Science, and a quality textbook PDF is essential for grasping its complexities․ The curriculum delves into crucial aspects like water properties, including how salinity impacts freezing points – a key concept explored through investigations․

Resources, such as the coursebook’s Topic 1․3, alongside supplementary materials and videos (like TedEd’s explanation of why ice floats), build a comprehensive understanding․ The PDF format allows students to easily navigate these resources, focusing on the interconnectedness of factors influencing marine ecosystems․

Students will learn about the significance of floating sea ice as a habitat for marine organisms, reinforcing the importance of this environment for biodiversity and ecological balance․ The textbook PDF serves as a central hub for this knowledge․

Marine Organisms

The AICE Marine Science textbook PDF dedicates significant coverage to marine organisms, exploring their diverse adaptations and ecological roles․ Students will investigate how these organisms interact with their environment, particularly concerning the impact of factors like floating sea ice – a critical habitat for numerous species․

The PDF facilitates detailed study of organismal biology, allowing for focused examination of adaptations to salinity, temperature, and pressure․ Resources within the textbook, coupled with external materials, provide a holistic view of marine biodiversity․

Understanding the relationship between organisms and their surroundings is paramount, and the PDF’s accessibility supports in-depth learning․ The Student Learner Guide complements this, aiding comprehension of complex biological processes within marine ecosystems;

Ocean Chemistry and Physics

The AICE Marine Science textbook PDF provides a robust foundation in ocean chemistry and physics, essential for understanding marine processes․ Key concepts, such as the effect of salinity on freezing point, are thoroughly explored, enabling students to analyze how these properties influence marine life and ecosystems․

The PDF details water properties, crucial for comprehending marine habitats and organismal adaptations․ Investigations into sodium chloride’s impact on freezing point are supported by the textbook’s resources, fostering practical skills and analytical thinking․

Students can leverage the PDF to grasp complex interactions between chemical and physical factors, vital for assessing environmental changes and their consequences․ The Student Learner Guide further enhances understanding of these core principles․

Utilizing the Textbook PDF Effectively

AICE Marine Science textbook PDFs offer search functionality and digital access features, integrating seamlessly with online learning platforms for optimal study․

Navigating the PDF – Search Functionality

Effective utilization of the AICE Marine Science textbook PDF hinges on mastering its search capabilities․ A robust search function allows students to quickly locate specific keywords, concepts, or terms within the extensive document․ This is particularly useful when reviewing complex topics like ocean chemistry or identifying information related to marine organisms and floating sea ice․

Instead of manually scrolling through pages, students can instantly jump to relevant sections, saving valuable study time․ Utilizing precise search terms – such as “salinity,” “freezing point,” or specific species names – will yield the most accurate results․ Remember to experiment with different keywords and phrases to ensure a comprehensive search․ This skill is essential for efficient exam preparation and deeper understanding of the curriculum․

Using Digital Access Features (if available)

Many AICE Marine Science textbook PDF versions, particularly those accessed through Cambridge University Press or bundled resources, offer enhanced digital features․ These can significantly improve the learning experience․ Look for interactive elements like embedded videos – such as the TedEd video explaining why ice floats – and clickable links to supplementary materials․

Digital access may also include features like highlighting, note-taking, and bookmarking, allowing for personalized study habits․ Some PDFs support zoom functionality for detailed examination of diagrams and data․ Directed Reading Worksheets, available as part of full-year bundles, are designed for digital interaction․ Explore all available tools to maximize comprehension and retention of key concepts within the marine science curriculum․

Integrating with Online Learning Platforms

Seamless integration of your AICE Marine Science textbook PDF with online learning platforms is vital in today’s educational landscape․ Many schools and educators utilize systems where PDFs can be directly uploaded and annotated․ This allows for collaborative learning, with teachers providing feedback directly on student-marked documents․

Furthermore, platforms often support linking to external resources mentioned within the textbook, such as relevant internet resources or online training opportunities․ The AICE Marine Science Student Learner Guide, also available as a PDF, complements this integration․ Utilizing schemes of work – often provided as PDFs – alongside the textbook ensures a structured and comprehensive learning experience, maximizing the benefits of digital resources․

Practical Skills and the Textbook

The AICE Marine Science textbook PDF supports practical skills, detailing investigations and experimental procedures; water properties and ice crystal formation are key examples․

Investigations and Data Analysis

The AICE Marine Science textbook PDF heavily emphasizes investigations, providing a foundation for robust data analysis skills․ Students will encounter investigations, such as those exploring the effect of sodium chloride on freezing points, requiring meticulous data collection and interpretation․

These practical exercises aren’t merely procedural; they demand critical thinking to analyze results and draw informed conclusions․ The textbook supports this process, guiding students through experimental procedures and offering insights into effective data representation․ Understanding how water molecules behave near ice surfaces, as detailed within the PDF, is crucial for interpreting investigation outcomes․

Furthermore, the PDF resource aids in connecting theoretical concepts to real-world applications, fostering a deeper understanding of marine science principles through hands-on learning and analytical rigor․

Understanding Experimental Procedures

The AICE Marine Science textbook PDF meticulously details experimental procedures, vital for student success․ Practical skills are a core component of the AS & A Level course, and the PDF serves as a guide to mastering these techniques․ It breaks down complex procedures into manageable steps, ensuring clarity and comprehension․

Students learn to design investigations, control variables, and accurately record observations – skills honed through examples within the PDF․ The resource emphasizes the importance of understanding why procedures are conducted in a specific manner, not just how to execute them․

This detailed approach, coupled with the PDF’s accessibility, empowers students to confidently approach practical assessments and develop a strong foundation in scientific methodology․

The Role of Practical Skills in Assessment

The AICE Marine Science textbook PDF underscores that practical skills are not merely supplementary, but integral to overall assessment․ A significant portion of the final grade relies on a student’s ability to apply theoretical knowledge through hands-on investigations․

The PDF prepares students for these assessments by providing detailed guidance on data analysis and interpretation․ It emphasizes the importance of accurate record-keeping, appropriate use of equipment, and the ability to draw valid conclusions from experimental results․

Mastering these skills, facilitated by the textbook PDF, is crucial for achieving success in the AICE Marine Science examinations and demonstrates a comprehensive understanding of the subject matter․

Specific Topics Covered in the Textbook

The AICE Marine Science textbook PDF details crucial topics like floating sea ice, salinity’s effect on freezing points, and fundamental water properties impacting marine life․

Floating Sea Ice and Marine Organisms

Sea ice plays a vital role in supporting marine ecosystems, a concept thoroughly explored within the AICE Marine Science textbook PDF․ The textbook details how ice provides a habitat for algae, which forms the base of the food web, sustaining various organisms․

It explains the importance of ice as a platform for breeding and resting for seals, polar bears, and seabirds․ The PDF resource likely includes investigations into the impact of diminishing ice cover due to climate change on these vulnerable species․ Students will learn about the physical properties of ice and its influence on ocean currents and salinity․

Resources like TedEd videos, referenced alongside the coursebook, likely supplement this understanding․ The textbook emphasizes the interconnectedness within marine environments and the critical role of ice in maintaining biodiversity․

The Effect of Salinity on Freezing Point

The AICE Marine Science textbook PDF dedicates significant attention to the relationship between salinity and the freezing point of water, a crucial concept in understanding marine environments․ It explains how dissolved salts lower the freezing point, preventing seawater from freezing as readily as freshwater․

The textbook likely details investigations into this phenomenon, prompting students to explore the effect of sodium chloride on freezing point – a practical skill emphasized in the syllabus․ Understanding this principle is vital for comprehending ocean stratification and the formation of sea ice․

The PDF resource will likely include data analysis exercises, requiring students to interpret experimental results․ This knowledge is essential for assessing the impact of freshwater input from melting ice on ocean circulation and marine life․

Water Properties and Marine Life

The AICE Marine Science textbook PDF thoroughly examines the unique properties of water and their profound influence on marine organisms․ It details how water’s high specific heat capacity moderates temperature fluctuations, creating stable habitats․ The PDF likely explores cohesion and adhesion, impacting nutrient distribution and plankton suspension․

Furthermore, the textbook will cover water’s role as a solvent, facilitating biochemical reactions essential for life․ It will explain how these properties affect the distribution and abundance of marine species, including those reliant on floating sea ice․

Students will find information on how water density variations drive ocean currents, influencing larval dispersal and nutrient upwelling, all detailed within the accessible PDF format․

Troubleshooting PDF Access Issues

PDF access can be problematic! Common issues include broken links, device incompatibility, and needing updated PDF reader software for the AICE Marine Science textbook․

Broken Links and Download Problems

Encountering broken links when attempting to download the AICE Marine Science textbook PDF is unfortunately common․ Several users have reported non-functional links as of August 29, 2023, requesting re-uploads․ If a direct download fails, try accessing the resource through different browsers or clearing your browser’s cache and cookies․

Alternatively, explore official Cambridge resources or reputable third-party repositories․ Persistent download issues might indicate server problems on the hosting site․ Consider checking back later or searching for alternative download locations․ Always verify the source’s legitimacy to avoid potentially harmful downloads․ Remember to scan any downloaded file with antivirus software before opening it․

Compatibility with Different Devices

AICE Marine Science textbook PDFs should generally be compatible across a wide range of devices, but variations can occur․ Most modern computers (Windows, macOS, Linux) and tablets (iPad, Android) natively support PDF viewing․ Smartphones also readily display PDFs, though screen size may require zooming and panning․

However, older devices or those with limited processing power might experience slower loading times or rendering issues․ Ensure your device has a current PDF reader application installed – Adobe Acrobat Reader is a reliable option․ Some features, like interactive elements within the PDF, may not function identically on all platforms․

PDF Reader Software Recommendations

For optimal viewing of your AICE Marine Science textbook PDF, several excellent reader applications are available․ Adobe Acrobat Reader remains the industry standard, offering comprehensive features and reliable performance across devices․ It’s free to download and provides tools for annotation and form-filling․

Alternatives include Foxit Reader, known for its speed and smaller file size, and SumatraPDF, a lightweight option ideal for older computers․ Many web browsers (Chrome, Firefox, Edge) also have built-in PDF viewers, suitable for basic reading․ Consider your specific needs – if you require advanced features like editing or digital signatures, a paid PDF editor might be necessary․

Supplementary Resources

AICE Marine Science students can benefit from the Student Learner Guide, online training, and relevant internet resources to enhance PDF understanding․

AICE Marine Science Student Learner Guide

The AICE Marine Science Student Learner Guide serves as an invaluable companion to the core textbook PDF, offering focused support for navigating the 9693 syllabus and examinations․ This freely downloadable resource, available as a PDF file, is specifically designed to aid students in mastering the complexities of marine science concepts․

It provides a structured approach to learning, complementing the coursebook and facilitating a deeper understanding of key topics․ The guide assists students in preparing for assessments, reinforcing practical skills, and effectively utilizing supplementary materials․ It’s a vital tool for success, offering clarity and direction throughout the AICE Marine Science course․ Accessing this guide alongside the textbook PDF maximizes learning potential․

Online Training Opportunities

Supplementing your AICE Marine Science textbook PDF with online training can significantly enhance your understanding and exam preparation․ Various platforms offer courses designed to align with the Cambridge syllabus, providing interactive learning experiences beyond the static text․

These opportunities often include webinars, virtual labs, and expert-led sessions, addressing complex topics like ocean chemistry and marine ecosystems․ Details of forthcoming training are frequently posted online, allowing flexible access to valuable resources․ Utilizing these platforms alongside your PDF textbook fosters a dynamic learning environment, reinforcing concepts and building practical skills․ Explore available options to maximize your success in AICE Marine Science․

Relevant Books and Internet Resources

Beyond the core AICE Marine Science textbook PDF, several supplementary materials can deepen your understanding․ “Marine Science for Cambridge IGCSE Coursebook with Digital Access” (Cambridge University Press, 2022) provides additional perspectives and practice questions․ The 9693 AICE Marine Science Student Learner Guide is invaluable for exam preparation and clarifying concepts․

Internet resources, like TedEd videos on topics such as why ice floats, offer engaging visual explanations․ Online repositories may host additional worksheets and directed reading materials, complementing your primary PDF․ Remember to critically evaluate online sources for accuracy and relevance․ Combining these resources with your textbook ensures a well-rounded and comprehensive learning experience for AICE Marine Science․

Future Updates and Syllabus Changes

Staying informed about updates to the AICE Marine Science syllabus is vital when utilizing a textbook PDF․ Any textbooks endorsed for examinations from 2025 remain suitable for the current syllabus, ensuring continued relevance․ However, Cambridge Assessment International Education frequently reviews and updates its syllabi․

Regularly check the official Cambridge website for announcements regarding syllabus modifications or revised assessment criteria․ These changes may necessitate supplementary materials or updated study strategies․ Be aware that digital access periods for textbooks have expiry dates; confirm your PDF’s access duration․ Proactive monitoring ensures your AICE Marine Science studies align with the latest examination requirements․

behringer powerplay p16 m manual

Behringer Powerplay P16-M Manual: A Comprehensive Guide (Updated 03/09/2026)

This manual‚ dated March 9th‚ 2026‚ provides detailed instructions for the Behringer Powerplay P16-M‚ sourced from manualsbase and offering 8.5MB of information.

Welcome to the world of personalized monitoring with the Behringer Powerplay P16-M! This digital personal monitoring system is designed to revolutionize how performers experience their sound on stage and in the studio. Unlike traditional monitor wedges‚ the P16-M empowers each musician with independent control over their individual mix‚ fostering a more focused and enjoyable performance environment.

This comprehensive guide‚ updated as of March 9th‚ 2026‚ will walk you through every aspect of setting up‚ configuring‚ and utilizing your P16-M system. Information gathered from resources like manualsbase provides a solid foundation for understanding this powerful tool. Whether you’re a seasoned professional or just starting out‚ this manual aims to demystify the P16-M and unlock its full potential. Prepare to experience clarity‚ control‚ and a new level of sonic precision.

What is the Powerplay P16-M?

The Behringer Powerplay P16-M is a revolutionary digital personal monitoring system‚ offering musicians unprecedented control over their stage sound. It’s a compact‚ rack-mountable unit that utilizes Behringer’s ULTRANET technology to deliver 16 channels of digital audio via a single Cat5 cable. This eliminates the clutter and complexity of traditional analog snake systems.

Essentially‚ the P16-M acts as a central distribution hub‚ sending audio signals from your mixing console directly to individual P16-M personal mixers at each performer’s station. Resources like manualsbase detail its function as a key component in modern live sound and recording setups. Each musician can then create a customized monitor mix‚ adjusting levels and panning for a truly personalized listening experience. It’s a game-changer for band clarity and performance quality;

Key Features and Benefits

The Behringer Powerplay P16-M boasts a wealth of features‚ making it a standout personal monitoring solution. Key among these is its 16-channel digital audio transmission via a single Cat5 cable‚ simplifying stage setup and reducing cable clutter. ULTRANET technology ensures reliable‚ low-latency audio delivery.

Benefits include independent level and EQ control for each channel at each mixer‚ allowing musicians to craft personalized mixes. Remote control capabilities‚ as highlighted in available documentation‚ offer further flexibility. The system’s compact‚ rack-mountable design saves valuable stage space. Manualsbase resources confirm its cost-effectiveness compared to traditional analog systems‚ providing professional-grade monitoring without a hefty price tag. Ultimately‚ the P16-M enhances performance clarity and control.

Setting Up Your Powerplay P16-M System

This section details the initial setup process‚ covering unboxing‚ connections to your mixing console‚ personal mixer integration‚ and proper system power-up procedures.

Unboxing and Initial Inspection

Upon receiving your Behringer Powerplay P16-M‚ carefully inspect the packaging for any signs of damage incurred during shipping. Gently open the box and verify that all included components are present. You should find the P16-M unit itself‚ a power cable‚ and potentially any included mounting hardware.

Crucially‚ cross-reference the contents with the included packing list to ensure nothing is missing. Thoroughly examine the P16-M for any visible cosmetic damage‚ such as scratches or dents. Check all connectors on the front and rear panels for any signs of bending or breakage. If any damage is detected‚ immediately contact Behringer Support and your retailer. Retain all original packaging materials for potential returns or warranty claims. A careful initial inspection safeguards your investment.

Connecting to a Mixing Console

Establishing a connection between your Behringer Powerplay P16-M and a mixing console is fundamental for operation. Utilize a Cat5e or Cat6 Ethernet cable to link the P16-M’s ULTRANET port to an available Ethernet output on your mixer. Ensure your mixing console supports ULTRANET transmission; this is a crucial requirement.

Importantly‚ the P16-M receives audio digitally via ULTRANET‚ so traditional analog connections won’t work. Configure your mixing console to send the desired audio channels through the ULTRANET output. Refer to your mixer’s manual for specific instructions on routing audio to the ULTRANET port. Once connected‚ the P16-M will receive the digital audio stream‚ ready for distribution to personal mixers.

Connecting Personal Mixers (P16-M)

To connect personal mixers (P16-M) to the Powerplay P16-M‚ employ standard Cat5e or Cat6 Ethernet cables. Each P16-M unit connects directly into one of the available ULTRANET ports on the rear panel of the main P16-M. This daisy-chain configuration allows for multiple personal mixers to be powered and receive audio from a single Powerplay P16-M unit.

Crucially‚ each P16-M receives the entire digital audio stream‚ enabling each musician to create a customized monitor mix. Ensure all connections are secure. The P16-M units will automatically synchronize with the main unit‚ receiving power and audio data via the ULTRANET connection‚ simplifying setup and operation for performers.

Powering the System

The Behringer Powerplay P16-M system requires a stable power source to operate reliably. The main P16-M unit utilizes a standard IEC power connector and accepts a wide voltage range‚ typically 100-240V ~50/60Hz. Important: Always verify your local voltage before connecting the power cable.

Notably‚ the P16-M personal mixers are powered directly through the ULTRANET connection from the main P16-M unit‚ eliminating the need for separate power supplies for each mixer. This simplifies cabling and setup significantly. Ensure the main unit is powered on before connecting the P16-M personal mixers to guarantee proper functionality and power distribution throughout the system.

Understanding the P16-M Interface

The P16-M boasts intuitive front panel controls‚ a comprehensive rear panel connection scheme‚ and a clear display screen for easy navigation and menu access.

Front Panel Controls

The Behringer Powerplay P16-M’s front panel is designed for quick and intuitive operation during live performance or studio sessions. Central to the control scheme is the rotary encoder‚ used for navigating menus and adjusting parameters. Adjacent to the encoder is a high-contrast LCD display‚ providing clear visual feedback of current settings and channel information.

Dedicated buttons allow for direct access to essential functions like channel selection‚ level adjustment‚ and EQ control. These buttons are logically arranged for ease of use‚ even in low-light conditions. A prominent power button ensures simple on/off operation. Furthermore‚ the front panel includes user-assignable buttons‚ allowing customization for frequently used functions‚ streamlining workflow and enhancing overall usability. The interface prioritizes accessibility and efficiency.

Rear Panel Connections

The Powerplay P16-M’s rear panel provides robust connectivity for seamless integration into any audio setup. It features dual ULTRANET ports‚ enabling daisy-chaining of multiple units for expanded monitoring capabilities. Standard XLR and ¼” TRS inputs accommodate various signal sources from mixing consoles and audio interfaces.

A dedicated AES/EBU digital audio input offers high-fidelity signal transmission. The rear panel also includes a convenient USB port for firmware updates and potential future control functionalities. Ground lift switches help eliminate unwanted noise and hum. Finally‚ a robust power connector ensures a stable and reliable power supply. These connections are designed for professional audio environments‚ prioritizing signal integrity and flexibility.

Display Screen Overview

The P16-M’s display screen is a central hub for navigating settings and monitoring performance. It utilizes a high-contrast LCD‚ providing clear visibility even in dimly lit environments. The main display area showcases channel levels‚ EQ settings‚ and monitoring group assignments. Dedicated icons indicate active features like phantom power or limiter engagement.

A menu navigation section allows users to scroll through various parameters. Numerical readouts display precise values for gain‚ pan‚ and EQ adjustments. Status indicators confirm ULTRANET connectivity and signal presence. The screen’s intuitive layout ensures quick access to essential controls‚ streamlining the setup and operation process for efficient monitoring.

Navigation and Menu System

The Powerplay P16-M employs a user-friendly menu system‚ navigated via a rotary encoder and dedicated buttons. Pressing the ‘Menu’ button accesses the main menu‚ revealing options for channel configuration‚ EQ adjustments‚ and system settings. The encoder allows for precise parameter adjustments‚ while the ‘Enter’ button confirms selections.

Submenus are logically organized‚ grouping related functions for efficient access. The ‘Back’ button returns to the previous menu level. A clear hierarchical structure minimizes navigation time. Users can quickly save and recall custom presets‚ streamlining setup for recurring performances. The intuitive design ensures even novice users can easily customize their monitoring experience.

Configuring the P16-M for Optimal Performance

Achieving superior sound requires careful configuration of input channels‚ output levels‚ EQ settings‚ and monitoring groups‚ tailored to your specific needs.

Setting Input Channels

Proper input channel configuration is fundamental to the Powerplay P16-M’s performance. Begin by assigning each physical input on your mixing console to a dedicated channel within the P16-M system. This is typically done through the ULTRANET connection‚ ensuring a digital signal path for optimal clarity.

Carefully label each channel to correspond with its source – for example‚ “Kick Drum‚” “Lead Vocal‚” or “Guitar.” Utilize the P16-M’s menu system to adjust input gain levels‚ ensuring a strong‚ clean signal without clipping. Pay attention to phantom power requirements for condenser microphones connected to your console.

Remember to verify the input routing on both your mixing console and the P16-M to avoid signal conflicts or missing audio. Consistent labeling and gain staging will streamline your workflow and deliver a professional sound.

Adjusting Output Levels

Precise output level control is crucial for a balanced and comfortable monitoring experience with the Powerplay P16-M. Each personal mixer (P16-M) allows individual users to tailor their own mixes‚ but initial output level settings on the main unit are essential.

Start with all output levels at a moderate position – around the 60% mark – to provide headroom and prevent sudden loud bursts. Encourage each musician to adjust their individual P16-M mixer levels to their preference. Monitor the master output to ensure the overall mix remains within safe and acceptable limits‚ avoiding clipping or distortion.

Regularly check and readjust output levels during rehearsals and performances to accommodate dynamic changes in the music. Consistent monitoring ensures a clear and enjoyable experience for everyone.

Using the EQ Controls

The Powerplay P16-M offers flexible EQ controls on each channel‚ allowing users to sculpt their individual monitor mixes for optimal clarity and sonic balance. These controls are vital for addressing problematic frequencies and enhancing desired elements within the mix.

Each channel typically features a low-frequency cut (high-pass filter) to remove rumble and unwanted low-end buildup. Additionally‚ a multi-band EQ – often with sweepable mid-frequencies – provides precise tonal shaping. Use subtle adjustments; excessive boosting or cutting can introduce unwanted artifacts.

Experiment with the EQ to address issues like muddy bass‚ harsh vocals‚ or thin-sounding instruments. Remember that EQ is subtractive – often‚ reducing unwanted frequencies is more effective than boosting desired ones.

Setting up Monitoring Groups

The Powerplay P16-M excels in creating personalized monitoring experiences through its monitoring group functionality. This allows musicians to tailor their mixes based on specific instrument groupings or overall song sections.

Within the P16-M’s interface‚ you can assign input channels to various monitoring groups. For example‚ a drummer might create a group for drums and bass‚ while a vocalist focuses on vocals and guitar. This segmentation provides focused control.

Careful group assignment ensures each performer receives a mix that highlights the elements most relevant to their performance. Experiment with different configurations to find what works best for your ensemble‚ enhancing stage clarity and individual confidence.

Advanced Features and Troubleshooting

Explore ULTRANET remote control‚ essential firmware updates‚ and solutions for common issues‚ alongside a comprehensive guide to deciphering error messages within the P16-M.

Remote Control via ULTRANET

ULTRANET offers powerful remote control capabilities for your Powerplay P16-M system‚ allowing adjustments from a compatible digital mixing console or computer. This digital audio network protocol facilitates bidirectional communication‚ enabling control of various parameters directly from your central mixing position.

To utilize ULTRANET‚ ensure your mixing console or computer is equipped with a ULTRANET port and appropriate software; Connection is typically achieved via a standard CAT5 or CAT6 Ethernet cable. Once connected‚ you can access and modify settings like input channel levels‚ EQ parameters‚ monitoring groups‚ and more‚ all without physically interacting with the P16-M units themselves.

This feature streamlines workflow‚ particularly in live sound environments‚ allowing engineers to make real-time adjustments to individual monitor mixes from the front-of-house position. Refer to your mixing console’s manual for specific instructions on configuring ULTRANET connectivity and control.

Firmware Updates

Maintaining up-to-date firmware on your Behringer Powerplay P16-M is crucial for optimal performance‚ stability‚ and access to the latest features. Behringer periodically releases firmware updates to address bug fixes‚ improve compatibility‚ and introduce new functionalities.

To update the firmware‚ you’ll typically need to download the latest version from the official Behringer website. The update process usually involves transferring the firmware file to a USB storage device and then connecting it to the P16-M unit. Follow the on-screen prompts and instructions carefully during the update procedure.

Important: Do not interrupt the firmware update process‚ as this could potentially damage the unit. Always refer to the official Behringer documentation for detailed instructions and precautions specific to your P16-M model and firmware version.

Troubleshooting Common Issues

Encountering issues with your Behringer Powerplay P16-M? Here’s a guide to resolving frequent problems. If you experience no audio‚ first verify all cable connections to the mixing console and personal mixers. Check power supplies for both the P16-M and connected devices.

For display issues‚ ensure sufficient brightness and contrast settings. If the unit freezes‚ try a power cycle – disconnect and reconnect the power cable. Network connectivity problems can often be solved by verifying ULTRANET cable integrity and network settings on all devices.

Remember to consult the error message section of this manual for specific codes and their meanings. If problems persist‚ refer to Behringer’s support resources for further assistance.

Understanding Error Messages

The Behringer Powerplay P16-M utilizes error messages to diagnose system issues. These codes‚ displayed on the unit’s screen‚ provide valuable clues for troubleshooting. A “Network Error” indicates a problem with the ULTRANET connection – check cabling and device configurations.

“Input Overload” signifies that an input channel’s signal is too strong‚ potentially causing distortion; reduce the input level at the mixing console. “Device Not Found” suggests a disconnected or malfunctioning personal mixer. Always refer to the comprehensive error code list within this manual for detailed explanations.

Understanding these messages allows for quicker and more effective problem resolution‚ minimizing downtime during performances or recording sessions. Contact Behringer support if an unfamiliar error persists.

Practical Applications and Use Cases

The Powerplay P16-M excels in live bands‚ worship settings‚ home studios‚ and rehearsal spaces‚ offering personalized monitoring solutions for diverse audio environments.

Live Band Performances

For live bands‚ the Behringer Powerplay P16-M revolutionizes stage monitoring. Each musician gains independent control over their monitor mix‚ eliminating the frustrating “monitor engineer bottleneck.” This system allows drummers to prioritize drums‚ vocalists to focus on their voice‚ and guitarists to emphasize their instrument – all simultaneously and without affecting others’ mixes.

The P16-M’s ULTRANET connectivity ensures reliable‚ low-latency audio transmission across the stage. This minimizes feedback issues and provides a pristine‚ clear monitoring experience. Bands can quickly adapt mixes between songs‚ optimizing performance and reducing soundcheck time. Furthermore‚ the personal mixers empower musicians to self-manage their sound‚ leading to greater satisfaction and a tighter‚ more focused performance. It’s a game-changer for any serious live act.

Worship Services

In worship settings‚ the Behringer Powerplay P16-M fosters a more immersive and focused experience for musicians and vocalists. The ability for each team member to craft a personalized monitor mix is invaluable‚ allowing them to clearly hear themselves and blend with the ensemble. This is particularly crucial for vocal harmonies and intricate instrumental arrangements.

The system’s reliability and clear audio transmission ensure a distraction-free environment‚ supporting a spirit of reverence and concentration. Minimizing feedback and providing consistent sound quality are paramount in a worship space‚ and the P16-M delivers on both fronts. Furthermore‚ the ease of use empowers volunteer teams to manage their own monitoring needs‚ reducing the burden on technical staff and enhancing the overall worship experience.

Home Recording Studios

For home recording enthusiasts‚ the Behringer Powerplay P16-M unlocks a new level of monitoring flexibility and control. It eliminates the need for complex headphone distribution amplifiers and lengthy cable runs‚ streamlining the recording process. Musicians can independently adjust their monitor mixes‚ focusing on specific instruments or vocal tracks during tracking sessions.

This personalized monitoring enhances performance accuracy and reduces latency‚ resulting in tighter‚ more professional recordings. The P16-M’s digital clarity minimizes coloration and provides a true representation of the audio signal. It’s an ideal solution for multi-instrumentalists or bands recording simultaneously‚ fostering a collaborative and efficient workflow within the confines of a home studio environment.

Rehearsal Spaces

The Behringer Powerplay P16-M dramatically improves the rehearsal experience for bands and musical ensembles. Traditional wedge monitors often create feedback issues and uneven coverage‚ hindering effective communication and performance. The P16-M provides each musician with a dedicated‚ personalized monitor mix‚ delivered directly through headphones or stage monitors.

This eliminates bleed and allows everyone to hear exactly what they need‚ fostering tighter ensemble playing and improved sonic clarity. Adjustments can be made on-the-fly without disrupting the overall mix‚ streamlining the rehearsal process. The system’s reliability and ease of setup make it perfect for both dedicated rehearsal spaces and temporary setups at various venues‚ ensuring consistent performance quality.

Technical Specifications and Support

Detailed power requirements‚ dimensions‚ and weight information are provided‚ alongside comprehensive contact details for Behringer support and helpful resources.

Power Requirements

The Behringer Powerplay P16-M is designed for reliable operation within specific power parameters. It requires a universal power supply‚ accepting input voltages ranging from 100V to 240V‚ 50/60Hz. This broad range ensures compatibility across various international power standards‚ making it suitable for global touring and diverse studio environments.

Power consumption is relatively low‚ typically around 20W‚ contributing to energy efficiency. The unit utilizes a standard IEC power connector for easy integration with existing power distribution systems. Always ensure the power supply is adequately grounded for safety and optimal performance. Using an incorrect power supply or voltage can damage the unit and void the warranty. Refer to the rear panel for specific voltage and current requirements.

Dimensions and Weight

Understanding the physical specifications of the Behringer Powerplay P16-M is crucial for proper installation and transportation. The unit boasts a compact and rugged design‚ facilitating easy integration into various setups. Its dimensions are approximately 9.5 inches (241 mm) in width‚ 7.7 inches (196 mm) in depth‚ and 1.7 inches (43 mm) in height.

These relatively small dimensions allow for flexible placement on stage‚ in a studio rack‚ or within a portable monitoring system. The P16-M weighs around 2.2 pounds (1 kg)‚ making it lightweight and convenient to carry. This portability is a significant advantage for musicians and engineers on the move. Careful consideration of these dimensions and weight is essential when planning system layouts and transportation logistics.

Contacting Behringer Support

Should you encounter any issues or require assistance with your Behringer Powerplay P16-M‚ Behringer offers several avenues for support. Their official website‚ www.behringer.com‚ is the primary resource‚ hosting a comprehensive FAQ section‚ downloadable resources‚ and troubleshooting guides.

For direct assistance‚ you can reach Behringer’s customer support team via email through the contact form on their website. Phone support is also available‚ though wait times may vary depending on location and demand. Be sure to have your unit’s serial number and a detailed description of the problem ready when contacting support.

Additionally‚ the Behringer community forum provides a platform for users to share knowledge and solutions. This collaborative environment can often offer quick answers to common questions.

Resources and Further Reading

Beyond this manual‚ several online resources can enhance your understanding and utilization of the Behringer Powerplay P16-M. Manualsbase (https://manualsbase.com/) provides access to the P16-M user manual‚ alongside a collection of other Behringer documentation.

YouTube is a valuable source‚ featuring numerous tutorial videos demonstrating setup‚ configuration‚ and advanced techniques. Search for “Behringer Powerplay P16-M tutorial” to discover a wealth of practical guidance. Online audio engineering forums‚ such as Gearspace and Reddit’s r/livesound‚ offer opportunities to connect with experienced users and ask specific questions.

Behringer’s website (www.behringer.com) also hosts application notes and software updates relevant to the P16-M system. Regularly checking these resources ensures you have the latest information and optimal performance.

bco guide to specification 2023

BCO Guide to Specification 2023: A Comprehensive Overview

The 2023 BCO Guide is a key resource‚ driving decarbonisation and updating standards for developers‚ focusing on health‚ wellbeing‚ and sustainable office spaces․

The British Council for Offices (BCO)‚ established in 1990‚ serves as the UK’s leading forum for the office sector‚ fostering discussion and best practices in workplace design․ Recognizing evolving needs‚ the BCO publishes the influential Guide to Specification‚ a cornerstone resource for developers‚ fit-out professionals‚ and designers․

The 2023 edition represents a significant update‚ accelerated from its planned 2024 release to address unprecedented changes impacting office spaces․ This guide provides authoritative advice on creating efficient‚ healthy‚ and sustainable workplaces‚ bridging the gap between design intent and actual building performance․ It’s a vital tool for navigating the complexities of modern office development and fit-out․

The Importance of the 2023 Update

The 2023 update to the BCO Guide to Specification is critically important due to a convergence of significant external influences reshaping the office landscape․ The climate crisis demands urgent action towards decarbonisation‚ necessitating revised energy performance standards․ Simultaneously‚ the widespread adoption of hybrid working models requires adaptable space planning and layouts․

Furthermore‚ evolving regulatory changes necessitate compliance and proactive adaptation․ Bringing the guide forward from 2024 acknowledges these pressures‚ providing timely guidance for developers and fit-out professionals․ This update isn’t merely a revision; it’s a response to a fundamentally altered context‚ ensuring the office sector remains relevant and responsible․

Key Drivers for Change: Climate Crisis‚ Hybrid Work‚ and Regulations

Three primary forces propelled the 2023 BCO Guide update: the escalating climate crisis‚ the rise of hybrid work‚ and shifting regulatory landscapes․ The urgent need for decarbonisation within the office sector demands enhanced energy efficiency and sustainable material choices․

Hybrid working necessitates flexible office layouts and optimized space allocation to accommodate fluctuating occupancy rates․ Simultaneously‚ new and evolving regulations require adherence to updated standards for health‚ wellbeing‚ and building performance․ These interconnected drivers prompted the BCO to proactively revise its guidance‚ ensuring relevance and practicality for today’s office environment․

Core Principles of the 2023 Specification

The guide centers on health & wellbeing‚ sustainability‚ and bridging the design-performance gap‚ offering best practices for intelligent and efficient office building design․

Health and Wellbeing Focus

The 2023 BCO Guide significantly prioritizes occupant health and wellbeing within office spaces․ Recognizing the evolving needs of the workforce‚ particularly post-pandemic‚ the specification emphasizes creating environments that support both physical and mental health․

This includes considerations for indoor air quality‚ achieved through enhanced ventilation systems and material selection minimizing harmful emissions․ Lighting design is also crucial‚ focusing on circadian rhythms and minimizing glare․ Furthermore‚ the guide addresses acoustic performance‚ aiming to reduce noise pollution and create more focused and comfortable workspaces․

Ultimately‚ the BCO aims to move beyond simply meeting minimum standards‚ advocating for proactive design strategies that actively promote the health‚ comfort‚ and productivity of building occupants․

Sustainability as a Central Tenet

The BCO Guide to Specification 2023 firmly establishes sustainability as a core principle for modern office design and fit-out․ Addressing the climate crisis‚ the guide promotes a lifecycle assessment approach to materials‚ encouraging the selection of sustainable options with reduced environmental impact․

Energy efficiency is paramount‚ with recommendations for optimizing building management systems and designs catering to varied energy requirements‚ including specialized areas․ The guide actively drives decarbonisation within the office sector‚ pushing for reduced carbon footprints throughout the building’s lifecycle․

This holistic approach extends beyond energy‚ encompassing responsible resource management and waste reduction‚ aligning with broader environmental goals․

Addressing the Design-Performance Gap

The 2023 BCO Guide to Specification directly tackles the persistent gap between intended design performance and actual operational outcomes in office buildings․ Recognizing this discrepancy as a critical issue‚ the guide emphasizes a more rigorous approach to specification and implementation․

It advocates for detailed consideration of real-world usage patterns‚ moving beyond theoretical calculations to ensure designs align with practical needs․ This includes accounting for lower occupancy rates and the evolving demands of hybrid working models․

By focusing on robust performance criteria and thorough commissioning‚ the guide aims to deliver buildings that consistently meet their sustainability and wellbeing goals․

Detailed Specification Updates

The 2023 guide provides updated criteria for space planning‚ layouts‚ ventilation‚ lighting‚ and acoustics‚ reflecting current needs and regulatory changes․

Space Planning and Area Allocation

The BCO Guide to Specification 2023 addresses evolving workplace dynamics‚ particularly the impact of hybrid working models on space requirements․ Recognizing lower occupancy rates‚ the guide proposes adjustments to key design criteria influencing area allocation․ This includes a re-evaluation of traditional norms to optimize space utilization and avoid inefficiencies stemming from outdated assumptions about full-time office presence․

The updated specification encourages flexible space planning that can adapt to fluctuating needs‚ supporting both collaborative and focused work modes․ Consideration is given to the provision of amenities and breakout areas that enhance employee wellbeing and foster a sense of community․ Ultimately‚ the goal is to create office environments that are both functional and responsive to the changing demands of the modern workforce․

Office Layouts for Hybrid Working Models

The 2023 BCO Guide emphasizes adaptable office layouts designed to accommodate hybrid work patterns effectively․ It moves beyond traditional fixed workstations‚ advocating for activity-based working environments that support a variety of tasks and working styles․ This includes dedicated collaboration zones‚ quiet focus areas‚ and flexible meeting spaces․

The guide stresses the importance of technology integration to facilitate seamless communication and collaboration between on-site and remote teams․ Consideration is given to optimizing layouts for video conferencing and ensuring equitable access to resources for all employees‚ regardless of location․ The aim is to create inclusive and productive workspaces that cater to the needs of a distributed workforce‚ maximizing efficiency and employee engagement․

Ventilation and Indoor Air Quality

The 2023 BCO Guide places significant emphasis on ventilation and indoor air quality (IAQ) as crucial components of a healthy workspace․ Recognizing the impact of IAQ on employee wellbeing and productivity‚ the guide advocates for enhanced ventilation systems capable of delivering optimal fresh air rates․

Recommendations include utilizing advanced filtration technologies to remove pollutants and allergens‚ alongside continuous monitoring of CO2 levels and other IAQ parameters․ The guide also promotes designs that maximize natural ventilation where feasible‚ and considers the integration of smart building technologies for automated IAQ control․ Prioritizing IAQ is presented as essential for creating resilient and healthy office environments․

Lighting Design and Optimization

The BCO Guide to Specification 2023 highlights the importance of sophisticated lighting design for both visual comfort and energy efficiency within office spaces․ It moves beyond simply meeting illumination levels‚ advocating for a holistic approach that considers circadian rhythms and individual user needs․

The guide recommends maximizing daylight utilization through careful building orientation and window placement‚ supplemented by high-performance LED lighting systems with intelligent controls․ These controls should allow for personalized adjustments and automated dimming based on occupancy and available daylight․ Emphasis is placed on minimizing glare and providing appropriate color temperature to support wellbeing and productivity․

Acoustic Performance Standards

The 2023 BCO Guide to Specification underscores the critical role of acoustics in creating productive and comfortable office environments․ Recognizing the impact of noise on concentration and wellbeing‚ the guide advocates for exceeding minimum standards and adopting a comprehensive acoustic strategy․

This includes addressing both airborne and impact noise transmission through careful material selection‚ layout design‚ and the incorporation of sound-absorbing elements․ The guide recommends considering various space types – open plan‚ meeting rooms‚ and private offices – each requiring tailored acoustic solutions․ Attention is given to reverberation times‚ speech privacy‚ and masking noise to minimize distractions and enhance communication․

Energy Performance and Decarbonisation

The guide addresses energy variance‚ recommending designs for typical usage and enhanced specifications for specialized areas‚ supporting decarbonisation efforts․

Variance in Energy Requirements

The BCO Guide to Specification 2023 acknowledges that not all office spaces have identical energy demands․ It moves away from a ‘one-size-fits-all’ approach‚ recognizing the diverse operational profiles within modern workplaces․ The guide recommends designing for typical office usage patterns as a baseline‚ ensuring efficient energy consumption for standard operations․

However‚ it crucially provides flexibility for enhanced specifications tailored to areas with significantly higher energy needs․ A prime example cited is call centers‚ which often require more intensive heating‚ cooling‚ and IT infrastructure․ This nuanced approach allows developers and fit-out professionals to optimize energy performance without compromising functionality or occupant comfort‚ ultimately contributing to a more sustainable and cost-effective building operation․

Strategies for Enhanced Energy Efficiency

The 2023 BCO Guide champions a proactive approach to energy efficiency‚ advocating for designs that minimize consumption at every stage․ This includes prioritizing high-performance building envelopes to reduce heating and cooling loads‚ alongside the integration of renewable energy sources where feasible․

A key recommendation focuses on optimizing Building Management Systems (BMS)‚ leveraging smart controls and data analytics to monitor and adjust energy usage in real-time․ The guide stresses the importance of commissioning and ongoing tuning of these systems to ensure peak performance․ Furthermore‚ it encourages the adoption of energy-efficient lighting‚ HVAC systems‚ and equipment‚ contributing to significant long-term savings and a reduced carbon footprint․

Optimizing Building Management Systems

The BCO Guide to Specification 2023 places significant emphasis on Building Management Systems (BMS) as crucial tools for energy efficiency and occupant comfort․ It advocates for intelligent controls capable of granular monitoring and adjustment of building systems‚ responding dynamically to occupancy patterns and environmental conditions․

Effective BMS optimization‚ according to the guide‚ requires thorough commissioning and continuous tuning․ Data analytics play a vital role‚ identifying areas for improvement and predicting potential issues before they impact performance․ Integration with smart grids and demand response programs is also encouraged‚ allowing buildings to actively participate in energy load balancing․ Ultimately‚ a well-optimized BMS delivers substantial operational savings and enhances the overall sustainability profile․

Materials and Fit-Out Considerations

The 2023 BCO Guide prioritizes sustainable material selection and lifecycle assessments for fit-outs‚ promoting efficient and responsible office space creation․

Sustainable Material Selection

The BCO Guide to Specification 2023 places significant emphasis on the careful selection of materials‚ advocating for choices that minimize environmental impact throughout their entire lifecycle․ This includes prioritizing materials with recycled content‚ those sourced from responsibly managed forests – evidenced by certifications – and options that are locally sourced to reduce transportation emissions․

Furthermore‚ the guide encourages a move away from materials containing harmful substances and promotes transparency in material composition; Consideration should be given to the embodied carbon of materials‚ opting for lower-carbon alternatives where feasible․ The guide supports a holistic approach‚ urging designers and fit-out professionals to evaluate the long-term sustainability of material choices‚ contributing to a circular economy and reducing waste․

Lifecycle Assessment of Materials

The 2023 BCO Guide to Specification strongly advocates for Lifecycle Assessment (LCA) as a crucial tool in sustainable material selection․ LCA involves evaluating the environmental impacts of a material throughout its entire lifespan – from raw material extraction and manufacturing‚ through transportation and use‚ to eventual end-of-life disposal or recycling․

This comprehensive approach allows for informed decisions‚ identifying materials with lower overall environmental footprints․ The guide encourages consideration of factors like energy consumption‚ water usage‚ and waste generation at each stage․ By adopting LCA‚ developers and fit-out professionals can move beyond simply selecting ‘green’ materials and instead prioritize those with demonstrably lower lifecycle impacts‚ fostering a truly sustainable built environment․

Fit-Out Recommendations for Efficiency

The BCO Guide to Specification 2023 emphasizes fit-out strategies that maximize efficiency and minimize environmental impact․ Recommendations include prioritizing modular and adaptable designs‚ reducing waste through prefabrication‚ and selecting materials with low volatile organic compound (VOC) emissions to enhance indoor air quality․

The guide also stresses the importance of flexible layouts to accommodate evolving workplace needs‚ particularly with the rise of hybrid working models․ Optimizing space utilization and incorporating smart building technologies are key considerations․ Careful planning during the fit-out phase is crucial for achieving long-term energy savings and creating a healthy‚ productive work environment‚ aligning with the guide’s core principles․

Complementary Guides and Resources

The 2023 BCO Guide works alongside the 2025 Fit Out Guide‚ alongside BCO Position Papers‚ offering comprehensive resources for best practice in office design․

Relationship to the 2025 Fit Out Guide

The BCO Guide to Specification 2023 and the forthcoming 2025 Fit Out Guide are designed to be complementary resources‚ working in tandem to support the creation of high-performing‚ sustainable office spaces․ While the Specification Guide establishes the overarching principles and criteria for office design – encompassing health‚ wellbeing‚ and environmental considerations – the Fit Out Guide will provide practical‚ detailed guidance on how to implement these principles during the fit-out phase․

Essentially‚ the 2023 Guide sets the ‘what’ and the 2025 Guide details the ‘how’․ This coordinated approach ensures a holistic view‚ minimizing discrepancies between initial design intent and the final delivered workspace․ Both guides aim to address the performance gap‚ promoting efficient office space creation and management‚ and ultimately contributing to the decarbonisation of the office sector․ They represent a unified strategy for best practice․

BCO Position Papers and Further Research

The BCO actively publishes position papers and conducts ongoing research to support and expand upon the recommendations within the Guide to Specification 2023․ These papers delve deeper into specific areas‚ offering nuanced perspectives on evolving workplace trends and challenges‚ such as hybrid working models and the climate crisis․

Established as Britain’s leading forum for the office sector since 1990‚ the BCO leverages its extensive industry network to gather insights and disseminate best practices․ Further research explores topics like intelligent buildings and information management‚ informing future updates to the Guide․ Accessing these resources provides a comprehensive understanding of the BCO’s stance and allows professionals to stay at the forefront of office design innovation and sustainability;

Utilizing the Guide for Best Practice

Effectively implementing the BCO Guide to Specification 2023 requires a holistic approach‚ integrating its recommendations throughout the entire office lifecycle – from initial design and construction to fit-out and ongoing management․ Developers and fit-out professionals should leverage the Guide’s expert advice on crucial areas like health‚ wellbeing‚ and sustainability․

Addressing the design-performance gap is paramount; the Guide provides key criteria updates and industry insights to inform decision-making․ By aligning projects with the BCO’s standards‚ organizations can demonstrably improve energy performance‚ reduce their environmental impact‚ and create truly future-proofed‚ people-centric workspaces․ It complements the 2025 Fit Out Guide for optimal results․

Impact and Future Outlook

The BCO’s 2023 Guide actively drives decarbonisation in the office sector while adapting to evolving workplace needs and shaping future office design․

Driving Decarbonisation in the Office Sector

The 2023 BCO Guide to Specification plays a pivotal role in accelerating decarbonisation efforts within the office sector․ Recognizing the urgent need for sustainable practices‚ the guide provides updated standards and practical recommendations for developers and fit-out professionals․

It addresses variance in energy requirements‚ advocating for designs that optimize energy efficiency while accommodating specialized areas with higher demands․ By promoting sustainable material selection and lifecycle assessment‚ the guide encourages a holistic approach to reducing the environmental impact of office buildings․

Ultimately‚ the BCO’s initiative aims to establish a new benchmark for sustainable office design‚ contributing significantly to a greener and more responsible built environment․

Adapting to Evolving Workplace Needs

The BCO Guide to Specification 2023 directly responds to the significant shifts in workplace dynamics‚ particularly the rise of hybrid working models․ Recognizing lower occupancy rates and changing employee expectations‚ the guide proposes updated key design criteria․

It emphasizes flexible office layouts that cater to both collaborative and individual workstyles‚ promoting health and wellbeing through optimized ventilation and indoor air quality․ The guide acknowledges the need for intelligent buildings and effective information management systems․

By addressing the design-performance gap‚ the BCO ensures that office spaces are not only aesthetically pleasing but also functionally aligned with the demands of the modern workforce․

The BCO’s Role in Shaping the Future of Offices

Established in 1990‚ the British Council for Offices (BCO) serves as Britain’s leading forum for discussing issues impacting the office sector․ The 2023 Guide to Specification exemplifies their commitment to driving positive change and establishing best practices․

By proactively updating standards – accelerating the timeline from a planned 2024 update – the BCO demonstrates responsiveness to unprecedented external influences like the climate crisis and regulatory shifts;

The BCO’s influence extends beyond the guide itself‚ through position papers and ongoing research‚ solidifying its role as a thought leader and shaping a sustainable‚ adaptable future for offices․

Powered by WordPress & Theme by Anders Norén