connected 510 battery instructions

This section provides a comprehensive guide to properly utilizing your connected 510 battery․
From initial setup and charging to connecting cartridges and understanding settings‚ these
instructions will ensure an optimal vaping experience․ Follow these steps for safe and efficient use․

Understanding 510 Thread Batteries

A 510 thread battery is the industry standard for powering vape cartridges‚ offering versatility
across various concentrates and oils․ The “510” refers to the threading size‚ making it
compatible with a wide range of cartridges․ These batteries typically utilize lithium-ion
technology‚ providing a balance of power and portability․ Familiarizing yourself with the
components and functionality of your 510 battery is crucial for a safe and enjoyable vaping
experience․ These batteries are commonly found in vape pens due to their simplicity‚ ease of
use‚ and relatively compact design․

Understanding the voltage settings and pre-heat functions is paramount for tailoring your vape
to your preferred experience․ Some batteries have a button while others are buttonless․
It is important to follow manufacturer instructions․ Always use the charger that came with the
battery․ A green icon means it is good to vape․

These batteries are convenient‚ portable‚ and easy to charge․

Identifying Battery Components

To effectively use your 510 thread battery‚ it’s essential to identify its key components․
The most prominent is the 510 threaded connection‚ where cartridges are attached․ The power
button‚ if present‚ controls activation and often allows voltage adjustments․ LED indicators
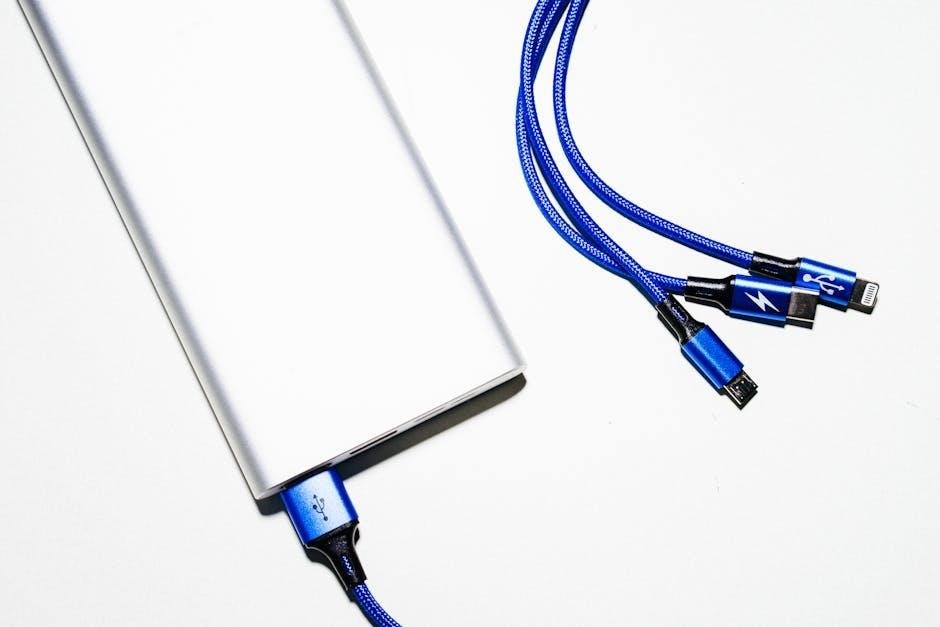
display battery life and settings․ The charging port‚ typically a micro-USB or USB-C‚ facilitates
recharging․ Some batteries feature variable voltage dials or buttons for customized vapor
production․

Many advanced models now include an OLED display screen‚ providing real-time information on
settings and puff count․ Understanding these components empowers you to optimize performance and
troubleshoot potential issues․ The battery casing protects the internal electronics․ The CartCover
adds protection․

By understanding the battery’s components‚ users can properly operate and maintain their devices․
When the bars turn red your battery needs to be recharged․ Some batteries require cartridges
with bottom or base airflow holes for proper usage․

Some batteries have a button while others are buttonless․
It is important to follow manufacturer instructions․ Always use the charger that came with the
battery․

Charging the 510 Battery

Properly charging your 510 battery is crucial for optimal performance and longevity․ First‚
identify the charging port‚ usually a micro-USB or USB-C; Connect the provided charging cable
to the port and plug it into a USB power source‚ such as a computer or wall adapter․ The LED
indicator will typically illuminate‚ often changing color (e․g․‚ red to green) once fully charged․
Avoid using high-voltage chargers‚ as they can damage the battery․

It is important to fully charge your battery with the charger that came with it․ Most 510
thread batteries have a light that shows when they are charged up (usually it changes from red to
green)․ The battery life indicator is displayed on the LED smart screen․ A green battery
icon means it is good to vape․

Do not put the battery at any environment over 45oC or inside water․ Always follow the
manufacturer’s instructions to get the most out of the battery․ Power off first‚ before
taking out the battery of the machine․

Monitor the charging process and disconnect the battery once fully charged to prevent
overcharging‚ which can reduce battery life․

Turning the Battery On/Off

Most 510 thread batteries utilize a simple five-click mechanism to turn on and off․ To activate
the battery‚ rapidly press the power button five times in quick succession․ The LED indicator
light will typically blink to confirm that the device has been turned on․ Repeat this process
to turn the battery off; the LED will again blink to acknowledge the command․

This safety feature prevents accidental activation while stored in a pocket or bag‚ conserving
battery life and preventing unintended heating of the attached cartridge․ Some batteries may
feature a lock/unlock function‚ also activated by pressing the button five times rapidly and
simultaneously․

If the battery does not light up after clicking five times‚ wait 10 more minutes and try
again․ Ensure your battery is adequately charged․ To unlock your pen you simply click the
button 5 times rapidly consecutively till the led on the button blinks up․

Always ensure the device is fully off before storing or transporting it․ Familiarize yourself
with the specific on/off procedure outlined in your battery’s user manual for optimal operation․

Attaching a 510 Cartridge

Connecting a 510 thread cartridge to your battery is a straightforward process․ First‚ ensure
that both the battery and the cartridge threads are clean and free of any debris․ Carefully
align the threads of the cartridge with the threads on the battery․ Gently screw the cartridge
onto the battery in a clockwise direction․

Avoid over-tightening‚ as this can damage the threads or the connection․ Screw the 510 thread
cartridge that is 12 MM in diameter or less all the way into the top of the vape battery․ The
cartridge should be snug but not forced․

Some devices utilize a magnetic adapter․ In these cases‚ screw the magnetic connector onto your
cartridge‚ then insert the cartridge into the slot of the device․

Once the cartridge is securely attached‚ test the connection by taking a small puff․ If the
battery activates and vapor is produced‚ the connection is successful․ If not‚ double-check
the connection and ensure that the battery is powered on․

Most batteries are compatible with most vape carts‚ and sizes up to 3ml‚ but it requires
cartridges with bottom or base airflow holes for proper use․

Variable Voltage Settings

Many 510 thread batteries offer variable voltage settings‚ allowing users to customize their
vaping experience․ Adjusting the voltage affects the heat applied to the cartridge‚ influencing
vapor production‚ flavor intensity‚ and overall smoothness․ To change the voltage settings on
a O․pen vape battery‚ consult the user manual for specific instructions‚ as methods vary
between devices․

Typically‚ voltage is adjusted by pressing the power button a specific number of times‚ often
three times in quick succession․ The device may indicate the current voltage setting through
LED lights or a display screen․ Lower voltage settings generally produce more flavorful vapor
with less intensity‚ while higher settings create larger clouds but can sometimes sacrifice
flavor․

Experiment with different voltage levels to find your preferred balance․ Start with a low setting
and gradually increase the voltage until you achieve the desired vapor production and flavor․

Pay attention to the manufacturer’s recommendations for your specific cartridge‚ as some are
better suited to certain voltage ranges․

The Honeystick Interactive 510 Battery Manual also provides the instructions

Pre-Heat Function Instructions

Many 510 thread batteries come equipped with a pre-heat function‚ designed to warm up
thick oils within the cartridge before use․ This feature is particularly useful in colder
environments or when the cartridge hasn’t been used for a while‚ as it helps to prevent
clogging and ensures a smoother‚ more consistent vapor production․

To activate the pre-heat function‚ typically you press the power button a specific number of
times‚ often twice in rapid succession․ The battery will then begin a short heating cycle‚

usually lasting between 10 and 15 seconds․ During this time‚ the device may display a
different colored light or vibrate to indicate that the pre-heat function is active․

Once the pre-heat cycle is complete‚ the battery will either automatically return to its
standard operating mode or require you to press the power button again to initiate vaping․

Refer to your battery’s user manual for precise instructions on how to activate and
deactivate the pre-heat function‚ as the method can vary between different models․ The
Honeystick Interactive 510 Battery Manual provides specific instructions for their
devices․ Using this function correctly can significantly improve your vaping experience‚
especially with thicker oils․

Changing Colors: Means pre-heat mode is engaged․ Push button to exit mode at anytime․

Usage Guide and Essential Tips

To maximize your vaping experience with a 510 thread battery‚ consider these usage tips․
First‚ always fully charge the battery before initial use․ This ensures optimal performance
and prolongs battery life․ When attaching a cartridge‚ avoid overtightening‚ as this can
damage the threads or the cartridge itself․

When vaping‚ start with short puffs to gauge the vapor production and adjust accordingly․
Holding the button for too long can overheat the cartridge‚ potentially leading to a burnt
taste․ If your battery has variable voltage settings‚ experiment to find the temperature
that best suits your preference and the type of oil you’re using․

For button-operated batteries‚ remember to turn the battery off when not in use to prevent
accidental activation․ Most batteries can be locked or unlocked by clicking the button five
times rapidly․ Also‚ be mindful of the cartridge size; the Honeystick Interactive 510
Battery‚ for instance‚ is compatible with cartridges up to 3ml․

Finally‚ keep your battery and cartridges clean․ Regularly wipe down the battery and the
cartridge connection points with a dry cloth to remove any residue․

By following these tips‚ you’ll not only enhance your vaping experience but also extend the
lifespan of your 510 thread battery and cartridges․

Maintenance and Storage

Proper maintenance and storage are crucial for prolonging the life of your 510 thread
battery; Regularly clean the battery contacts and the 510 thread connection with a
cotton swab dipped in isopropyl alcohol․ This removes residue buildup‚ ensuring a solid
connection․

Avoid exposing your battery to extreme temperatures or humidity‚ as this can damage the
internal components․ Store the battery in a cool‚ dry place away from direct sunlight․
When not in use for extended periods‚ it’s best to store the battery partially charged‚
around 40-60%․

Before storing‚ ensure the battery is turned off to prevent accidental activation․ Some
batteries have a locking feature activated by pressing the button five times rapidly; utilize
this function․ Periodically check the battery for any signs of damage‚ such as cracks or
swelling‚ and discontinue use if any are observed․

For cleaning cartridges‚ refer to the manufacturer’s instructions‚ but generally‚ a gentle wipe
with a soft cloth is sufficient․ Never submerge cartridges in liquid․

By adhering to these maintenance and storage guidelines‚ you’ll ensure your 510 thread
battery remains in optimal condition‚ providing consistent and reliable performance for
years to come․

periodic table of elements pdf black and white

Explore the fundamental building blocks of matter with our collection of black and white periodic tables in PDF format. These printable resources are designed for clarity and ease of use, perfect for students and educators.

The periodic table of elements is an indispensable tool in chemistry, organizing all known elements based on their atomic structure and properties. While color-coded tables offer visual cues, black and white versions provide a simplified, practical alternative. This introduction explores the significance and utility of black and white periodic tables, particularly in PDF format;

Black and white periodic tables are designed for accessibility and convenience. They eliminate the need for color printing, making them ideal for classrooms, study groups, and individual use. These tables present key information, such as atomic number, symbol, name, and atomic mass, in a clear, concise manner.

The PDF format ensures that the table can be easily downloaded, printed, and shared across different devices. Whether you’re a student preparing for an exam or a teacher creating lesson plans, a black and white periodic table in PDF format is a versatile and reliable resource.

Benefits of Using Black and White Periodic Tables

Black and white periodic tables offer several distinct advantages, making them a preferred choice for various educational and professional settings. One primary benefit is their cost-effectiveness. Since they don’t require color printing, they save on ink and printing expenses, particularly in environments with high printing volumes.

Furthermore, black and white tables enhance clarity. By removing color distractions, they allow users to focus on essential data such as atomic numbers, symbols, and masses. This simplicity aids in memorization and understanding of elemental properties. These tables are also highly accessible, ensuring that individuals with color vision deficiencies can easily interpret the information.

The availability of these tables in PDF format ensures easy distribution and compatibility across different devices. Black and white periodic tables are versatile tools that promote efficient learning and reference, ideal for students, educators, and researchers.

Key Information Included in Black and White Tables

Black and white periodic tables, while simplified in appearance, retain crucial information necessary for understanding chemistry. These tables prominently feature the atomic number of each element, which indicates the number of protons in an atom’s nucleus, defining its identity. Next, the element symbol is included, a one- or two-letter abbreviation derived from the element’s name, often from Latin.

The full element name is also provided, ensuring clarity and ease of recognition. Furthermore, the atomic mass, representing the average mass of an element’s atoms in atomic mass units, is displayed. This value is crucial for stoichiometric calculations and understanding isotopic abundance.

Some tables may also incorporate additional information such as electron configurations or electronegativity values. Despite their monochromatic design, these tables offer a comprehensive overview of fundamental chemical data, making them invaluable resources for both students and professionals.

Atomic Number

The atomic number is a fundamental property of an element, defining its identity and position within the periodic table. Representing the number of protons found in the nucleus of an atom, the atomic number is a unique identifier for each element. For instance, all hydrogen atoms possess one proton (atomic number 1), while all oxygen atoms have eight protons (atomic number 8).

The atomic number dictates an element’s chemical behavior and its ability to form bonds with other elements. Elements are arranged in ascending order of their atomic numbers within the periodic table, reflecting the periodic recurrence of similar chemical properties. This arrangement highlights trends in reactivity, electronegativity, and ionization energy.

The atomic number is typically displayed prominently within each element’s cell on a periodic table, allowing for quick and easy identification. It is a cornerstone of understanding chemical principles and a vital tool for students and scientists alike.

Element Symbol

The element symbol is a shorthand notation used to represent a chemical element. Typically consisting of one or two letters, these symbols are universally recognized and employed in chemical formulas and equations. The first letter of an element symbol is always capitalized, while the second letter, if present, is lowercase. For example, ‘H’ represents hydrogen, and ‘He’ represents helium.

Many element symbols are derived directly from the element’s name in English. However, some symbols originate from Latin or other languages, reflecting the historical discovery and naming of these elements. For instance, ‘Na’ represents sodium (from the Latin word ‘natrium’), and ‘Fe’ represents iron (from the Latin word ‘ferrum’).

The element symbol serves as a concise and efficient means of communicating chemical information. It is prominently displayed on the periodic table within each element’s cell, enabling quick identification and reference. Understanding element symbols is crucial for comprehending chemical nomenclature and effectively conveying chemical concepts.

Atomic Name

The atomic name, or element name, is the designated title given to each unique type of atom, representing a specific element. This name serves as a fundamental identifier in the world of chemistry and is used universally to refer to a particular element, regardless of its state or chemical combination. For example, “hydrogen” is the atomic name for the element with one proton.

Each element is assigned a distinct name, often originating from historical, geographical, or mythological sources. These names are standardized by the International Union of Pure and Applied Chemistry (IUPAC), ensuring consistent and unambiguous communication within the scientific community. Discovering the history and etymology can provide insight into the cultural relevance.

The atomic name, along with the element symbol and atomic number, forms the core set of information presented for each element on the periodic table. Familiarity with atomic names is essential for understanding chemical compounds, reactions, and the overall organization of matter. It allows chemists and students to clearly and accurately describe the composition of substances.

Atomic Mass/Weight

The atomic mass, also referred to as atomic weight, signifies the average mass of an atom of a specific element. It is a crucial value displayed on the periodic table, typically located below the element symbol and atomic name. It represents a weighted average of the masses of all the isotopes of that element, considering their relative abundance in nature.

The atomic mass is expressed in atomic mass units (amu), where one amu is defined as 1/12th of the mass of a carbon-12 atom. Because it is a weighted average, the atomic mass of an element is not always a whole number. It reflects the combined contribution of protons, neutrons, and a small amount from the electrons within the atom.

Understanding atomic mass is essential for various chemical calculations, such as determining the molar mass of compounds and stoichiometric relationships in chemical reactions. When using a black and white periodic table, the atomic mass provides a quantitative measure that aids in predicting and analyzing chemical behavior. Its accurate determination is crucial for precise scientific measurements.

Available Formats and Resolutions

Black and white periodic tables are often available in multiple formats to suit different needs and applications. The most common format is PDF (Portable Document Format), which is ideal for printing and viewing on various devices while preserving the original formatting. PDFs can be easily scaled without loss of quality, ensuring readability at different zoom levels.

Image formats like PNG (Portable Network Graphics) are also popular, especially for digital use. PNGs offer lossless compression, which means the image quality remains high even after multiple saves and edits. Other image formats, such as JPG, may also be available, though they might not be as suitable for detailed graphics due to lossy compression.

Resolution is another crucial factor. High-resolution versions ensure clear, crisp printing and are suitable for large posters or detailed analysis. Lower-resolution versions are suitable for quick reference or embedding in documents where file size is a concern. Consider your intended use when selecting the format and resolution of your black and white periodic table.

PDF Format

The PDF format is a widely favored choice for distributing black and white periodic tables due to its versatility and compatibility across various platforms. PDF files maintain their formatting regardless of the operating system, device, or software used to open them, ensuring that the table appears as intended.

Black and white periodic tables in PDF format are easily printable, allowing users to create physical copies for classroom use, personal study, or reference materials. The format also supports high resolutions, providing clear and legible text and symbols even when printed in larger sizes.

Furthermore, PDFs can be easily shared electronically via email, cloud storage, or websites, making them convenient for collaboration and distribution. Many PDFs are also layered, allowing users to customize what information to print, tailoring the table to specific grade levels or learning objectives. This adaptability makes the PDF format an excellent choice for educational purposes.

Image (PNG, etc.) Format

Black and white periodic tables are also commonly available in image formats like PNG. PNG files offer several advantages, including lossless compression, which preserves the quality of the image even after multiple saves and edits. This is particularly important for detailed diagrams like the periodic table, where clarity is essential.

PNG images are also widely compatible with various software applications and web browsers, making them easy to incorporate into presentations, documents, or websites. The black and white color scheme ensures that the image remains legible and professional-looking, regardless of the display settings.

Additionally, image formats allow for easy resizing and manipulation, enabling users to adjust the table to fit their specific needs. Whether it’s for a small screen or a large poster, PNG images maintain their sharpness and detail.

However, unlike PDFs, image formats may not always retain the same level of print quality or support layered information, so these factors should be considered when choosing the appropriate format.

Printing Considerations for Black and White Tables

When printing black and white periodic tables, several factors can impact the final result. Selecting the appropriate paper type is essential; brighter, smoother paper enhances contrast and clarity. Ensure your printer settings are optimized for black and white printing to prevent unnecessary color ink usage.

Consider the size of the table you intend to print. Larger formats may require adjustments to the printer settings to “fit to page” or “scale” the image appropriately. Always preview the print before committing to the final output to avoid cropping or distortion.

For optimal legibility, especially with smaller fonts or intricate details, a higher print resolution is recommended. Check your printer’s capabilities and select the highest available DPI (dots per inch) setting. Regularly clean your printer heads to prevent streaking or smudging.

Finally, if printing multiple copies, consider using a laser printer for its speed and cost-effectiveness, especially when dealing with large volumes of black and white documents. A well-maintained printer guarantees a crisp, professional-looking periodic table.

Downloading and Printing Instructions

To download a black and white periodic table in PDF format, simply click on the provided download link. The PDF file will open in a new browser window or automatically download to your device, depending on your browser settings; Ensure you have a PDF reader installed, such as Adobe Acrobat Reader, to view the file.

Once downloaded, open the PDF file. To print, navigate to the “File” menu and select “Print.” In the print dialog box, choose your desired printer from the available options. Verify that your printer is connected and online before proceeding.

Adjust the print settings as needed. For optimal results, select “Fit to Page” to ensure the entire table is printed within the paper margins. You can also adjust the paper orientation (portrait or landscape) based on the table’s layout. Ensure black and white printing is selected to avoid unnecessary color ink consumption.

Finally, click “Print” to begin the printing process. Allow the printer to complete the task, and carefully remove the printed periodic table. Store it in a safe place for future reference.

Educational Uses and Applications

Black and white periodic tables serve as invaluable tools in education, offering a clear and concise representation of the elements. Students can readily use them for memorizing element symbols, atomic numbers, and atomic masses. The simplified format reduces distractions, aiding focus during study sessions and test preparation.

In classroom settings, these tables facilitate interactive learning activities. Teachers can use them for quizzes, group discussions, and element identification exercises. The absence of color allows students to concentrate on the fundamental properties and relationships between elements.

Furthermore, black and white tables are ideal for photocopying and distribution. Their cost-effectiveness makes them a practical resource for large classes and resource-constrained environments. They can also be easily incorporated into worksheets, study guides, and laboratory manuals.

Beyond the classroom, these tables are beneficial for self-study and independent research. They provide a quick reference for understanding chemical reactions, predicting element behavior, and exploring advanced chemistry concepts. Whether you’re a student, educator, or science enthusiast, a black and white periodic table is an essential resource for mastering the elements.

massage gun attachment guide

This guide serves as a comprehensive resource for understanding massage gun attachments․ We’ll explore the various types available, their specific uses, and the benefits they offer for muscle recovery and relaxation․ Learn how to choose the right attachment to target different muscle groups effectively․

Massage guns have become increasingly popular tools for fitness enthusiasts and individuals seeking muscle relief․ A key component of their versatility lies in the interchangeable attachments that come with them․ These attachments are designed to target specific muscle groups and provide varying levels of intensity, allowing for a customized massage experience․

Understanding the purpose of each attachment is crucial to maximizing the benefits of your massage gun․ Different shapes and materials are used to address various needs, from deep tissue work to gentle surface stimulation․ Whether you’re an athlete recovering from a strenuous workout or someone seeking relief from everyday muscle tension, selecting the appropriate attachment can significantly enhance your massage gun’s effectiveness․

This guide will delve into the world of massage gun attachments, providing a detailed overview of the most common types and their intended uses․ We’ll explore how to choose the right attachment for specific body parts and how to properly clean and maintain them to ensure longevity․ By mastering the use of these attachments, you can unlock the full potential of your massage gun and achieve optimal muscle recovery and relaxation․

Common Types of Massage Gun Attachments

Massage guns typically come equipped with a variety of attachments, each designed for a specific purpose․ Recognizing these common types and understanding their intended uses is essential for maximizing the benefits of your massage gun․ Among the most frequently encountered attachments are the ball, flat, bullet, fork, and air cushion heads․

The ball attachment, often round and made of foam or hard plastic, is a versatile option suitable for large muscle groups like the quads and hamstrings․ The flat attachment offers a broader surface area, making it ideal for general muscle relaxation and addressing tension in areas like the back․ For pinpoint muscle treatment and smaller muscle groups, the bullet head allows you to dig deep into the tissues of areas like the hands and feet․

The fork attachment, with its two prongs, is specifically designed for targeting muscles around the spine and Achilles tendon, avoiding direct contact with bones․ Finally, the air cushion attachment provides a gentler massage experience, making it suitable for sensitive areas or individuals with lower pain tolerance․ Each of these attachments plays a unique role in providing targeted muscle relief and enhancing the overall massage experience․

Ball Attachment: Uses and Benefits

The ball attachment is arguably the most versatile and widely used massage gun head, found in almost every massage gun kit․ Its rounded shape and varying densities, from soft foam to hard plastic, make it suitable for a broad range of applications․ Primarily, the ball attachment is designed for treating larger muscle groups, such as the quadriceps, hamstrings, glutes, and even the biceps and triceps․

One of the key benefits of using the ball attachment is its ability to improve blood circulation․ The percussive therapy delivered by the massage gun helps to increase blood flow to the targeted muscles, promoting faster recovery and reducing muscle soreness․ This makes it an excellent tool for warming up muscles before exercise or easing tension after a workout or prolonged periods of sitting․

Furthermore, the ball attachment is effective for releasing muscle knots and reducing overall muscle stiffness․ Its larger surface area allows for a more generalized massage, making it ideal for addressing broader areas of tension․ By applying consistent pressure and vibration, the ball attachment can help break down adhesions and improve muscle flexibility, ultimately contributing to enhanced athletic performance and reduced risk of injury․

Flat Attachment: Uses and Benefits

The flat attachment is another common and versatile massage gun head, characterized by its flat, smooth surface․ This design makes it well-suited for working on broad muscle groups and areas where you want to distribute the massage force more evenly․ Unlike the ball attachment which offers a more generalized massage, the flat attachment provides a slightly more focused approach while still covering a substantial area․

A key benefit of the flat attachment is its effectiveness in reducing muscle tension and promoting relaxation․ The even distribution of pressure allows for a comfortable yet effective massage, helping to soothe sore muscles and alleviate stiffness․ It’s particularly useful for post-workout recovery, as it can help flush out metabolic waste products and reduce inflammation in the muscles․

Furthermore, the flat attachment can be used to improve circulation and warm up muscles before exercise․ By gently massaging the targeted area, you can increase blood flow and prepare the muscles for activity․ This can help to reduce the risk of injury and improve athletic performance․

While it’s generally safe to use on most muscle groups, it’s important to avoid using the flat attachment directly on bony areas or joints, as this can cause discomfort or injury․ Start with a low intensity setting and gradually increase the pressure as needed, paying attention to your body’s response․

Bullet Head Attachment: Uses and Benefits

The bullet head attachment, distinguished by its small, pointed tip, is designed for pinpoint muscle treatment and targeting specific trigger points․ This attachment allows you to deliver a focused and intense massage to smaller muscle groups or areas with deep-seated tension․ Its precision makes it ideal for breaking up knots and adhesions in muscles that are difficult to reach with larger attachments․

One of the primary benefits of the bullet head attachment is its ability to relieve localized pain and discomfort․ By applying direct pressure to trigger points, it can help release muscle spasms and reduce pain signals․ This makes it a valuable tool for addressing specific areas of tension, such as knots in the shoulders or tight spots in the calves․

The bullet head is also effective for working on smaller muscle groups like the hands and feet․ These areas often accumulate tension due to repetitive movements or prolonged periods of standing or walking․ Using the bullet head attachment can help improve circulation, reduce swelling, and alleviate pain in these areas․

When using the bullet head attachment, it’s crucial to exercise caution and start with a low intensity setting․ Apply gentle pressure to the targeted area and gradually increase the intensity as needed․ Avoid using the bullet head on bony areas or sensitive tissues, as this can cause discomfort or injury․ It is essential to listen to your body and stop if you experience any pain․

Fork Attachment: Uses and Benefits

The fork attachment, easily recognized by its two-pronged design, is specifically engineered for targeting muscles surrounding the spine and Achilles tendon․ Its unique shape allows it to straddle these sensitive areas without applying direct pressure on bone, making it a safer and more comfortable option compared to other attachments․

One of the primary benefits of the fork attachment is its ability to relax the muscles along the spine․ By gently massaging the paraspinal muscles on either side of the spine, it can help relieve tension, improve posture, and reduce back pain․ The fork design ensures that the massage is focused on the muscles and not on the vertebrae themselves, minimizing the risk of injury․

The fork attachment is also highly effective for treating the Achilles tendon, a common site of pain and inflammation for athletes and active individuals․ By massaging the muscles surrounding the Achilles tendon, it can help improve blood flow, reduce stiffness, and promote healing․ The fork design allows for targeted massage without putting excessive pressure on the tendon itself․

When using the fork attachment, it’s important to start with a low intensity setting and gradually increase the pressure as needed․ Move the attachment slowly and smoothly along the targeted area, avoiding any jerky or abrupt movements․ It’s also crucial to avoid using the fork attachment on bony areas or areas with acute inflammation․

The fork attachment is a versatile tool for addressing muscle tension and promoting recovery in specific areas of the body․ Its unique design makes it a safe and effective option for massaging the muscles surrounding the spine and Achilles tendon․

Air Cushion Attachment: Uses and Benefits

The air cushion attachment, also known as the pneumatic head, is designed to provide a gentler, more cushioned massage experience․ This attachment is particularly beneficial for individuals with sensitive skin, those recovering from injuries, or anyone who prefers a less intense massage․ The air-filled design helps to distribute the force of the massage gun more evenly, reducing the risk of discomfort or pain․

One of the primary uses of the air cushion attachment is for treating delicate areas of the body, such as the neck, face, and joints․ The softer impact of this attachment makes it suitable for massaging muscles close to bone or areas that are easily irritated․ It can help to relieve tension headaches, reduce jaw pain, and improve circulation in the face․

The air cushion attachment is also a good option for individuals with chronic pain conditions, such as fibromyalgia or arthritis․ The gentle massage can help to reduce pain and stiffness without exacerbating symptoms․ It can also be used to promote relaxation and reduce stress․

When using the air cushion attachment, it’s important to start with a low intensity setting and gradually increase the pressure as needed․ Move the attachment slowly and smoothly over the targeted area, paying attention to your body’s signals․ Avoid applying too much pressure, as this can negate the benefits of the cushioned design․

The air cushion attachment is a versatile tool for providing a gentle and effective massage․ Its cushioned design makes it suitable for sensitive areas of the body, individuals with chronic pain, and anyone who prefers a less intense massage experience․ It can help to relieve tension, reduce pain, and promote relaxation․

Using Attachments for Specific Body Parts

Selecting the right massage gun attachment is crucial for targeting specific muscle groups and achieving optimal results․ Different body parts require different approaches due to variations in muscle size, density, and proximity to bone․ Understanding which attachment is best suited for each area can significantly enhance the effectiveness of your massage gun therapy․

For large muscle groups like the quadriceps, hamstrings, and glutes, the ball attachment is generally recommended․ Its broad surface area allows for efficient coverage and deep tissue massage․ When working on the back, the fork attachment can be particularly useful for targeting muscles along the spine, while avoiding direct contact with the vertebrae․

Smaller muscle groups, such as those in the hands and feet, benefit from the precision of the bullet head attachment․ Its pointed tip allows for targeted treatment of knots and trigger points․ The flat attachment is a versatile option for various body parts, providing a more general massage and promoting blood circulation․

When massaging sensitive areas like the neck and shoulders, it’s essential to use a gentler approach․ The air cushion attachment can be a good choice for these areas, as its cushioned design helps to minimize discomfort․ Always start with a low intensity setting and gradually increase the pressure as needed․

Remember to avoid using massage guns directly on bones or joints․ Focus on the surrounding muscles to relieve tension and improve mobility․ By carefully selecting the appropriate attachment and adjusting the intensity level, you can tailor your massage gun therapy to meet the specific needs of each body part․

Cleaning and Maintaining Attachments

Proper cleaning and maintenance of your massage gun attachments are essential for ensuring hygiene, prolonging their lifespan, and maintaining optimal performance․ Over time, attachments can accumulate sweat, oils, and debris, which can not only harbor bacteria but also degrade the material and affect their functionality․

After each use, it’s recommended to wipe down the attachments with a clean, damp cloth․ For a more thorough cleaning, you can use mild soap and water․ Avoid harsh chemicals or abrasive cleaners, as these can damage the surface of the attachments․ Ensure that all soap residue is rinsed off completely and that the attachments are allowed to air dry thoroughly before storing them․

Some attachments may be dishwasher-safe, but it’s always best to check the manufacturer’s instructions before placing them in the dishwasher․ High temperatures and harsh detergents can potentially warp or damage certain materials․ If you’re unsure, hand washing is always the safest option․

In addition to regular cleaning, it’s important to inspect your attachments periodically for any signs of wear and tear․ Cracks, tears, or other damage can compromise their effectiveness and potentially pose a safety hazard․ If you notice any damage, it’s best to replace the attachment immediately․

Proper storage is also crucial for maintaining the condition of your massage gun attachments․ Store them in a clean, dry place away from direct sunlight and extreme temperatures․ Consider using a dedicated storage case or bag to protect them from dust and damage․ By following these simple cleaning and maintenance tips, you can keep your massage gun attachments in top condition and enjoy their benefits for years to come․

california corporation form 100 instructions

California corporations use Form 100 to file their franchise or income tax with the state. The California Franchise Tax Board provides the form and a comprehensive instruction booklet on its website. This booklet includes essential schedules and related forms needed for accurate filing.

Overview of Form 100

Form 100, officially known as the California Corporation Franchise or Income Tax Return, is a crucial document for corporations operating in California. It serves as the primary tool for calculating and reporting the franchise or income tax owed to the state. The form requires corporations to detail their income, deductions, and credits, which are then used to determine the tax liability. Comprehensive instructions are available from the California Franchise Tax Board (FTB) to aid in accurate completion. These instructions cover various aspects, including eligibility, specific line-item explanations, and common errors to avoid. Proper completion and timely submission of Form 100 are essential for compliance with California tax laws.

Purpose of Form 100

Form 100 enables California corporations to calculate and remit their franchise or income tax. It facilitates reporting income, deductions, and credits. Accurate filing ensures compliance with California tax regulations, and the form is vital for proper tax assessment.

Filing Requirements

California corporations must file Form 100 to report and pay their franchise or income taxes. The form requires detailed financial information, including income statements, balance sheets, and deductions. Corporations must accurately complete each section, ensuring all figures align with their financial records.

Compliance involves submitting the completed form by the due date. Extensions may be available, but they require prior application. Corporations should review the instructions carefully to avoid errors, which can lead to penalties. Maintaining thorough documentation is crucial for supporting the information provided on Form 100.

Electronic filing options are available and often encouraged for faster processing. Taxpayers should verify their entity ID, like their California Corporation Number, when filing.

Who Must File Form 100

All corporations doing business in California, including banks, financial corporations, RICs, REITs, FASITs, and corporate general partners of partnerships, must file Form 100. This requirement ensures compliance with California’s franchise tax regulations.

Minimum Franchise Tax

All corporations subject to California’s franchise tax are required to pay at least the minimum franchise tax. This includes banks, financial corporations, RICs, REITs, FASITs, corporate general partners of partnerships, and corporate members of LLCs doing business in California. Regardless of income, these entities must fulfill this minimum obligation.

Form 100 is used to calculate and remit this tax, ensuring that all covered entities contribute to the state’s revenue. Failing to pay the minimum franchise tax can lead to penalties and legal issues, underscoring the importance of compliance for all California corporations.

Key Sections of Form 100 and Schedules

Form 100 includes crucial schedules like Schedule H for dividend income deduction and Schedule P for alternative minimum tax and credit limitations. These sections help corporations accurately report and calculate their tax obligations.

Schedule H (100): Dividend Income Deduction

Schedule H (100) on California Form 100 allows corporations to claim a deduction for dividend income received from other corporations. Understanding the specific rules and limitations for this deduction is essential for accurate tax calculation. The schedule requires corporations to provide details about the dividends received, including the payer’s name and the amount.

Careful completion of Schedule H can result in significant tax savings for eligible corporations. Ensure all requirements are met and that supporting documentation is readily available. Misreporting dividend income can lead to penalties. Review the form instructions thoroughly before completing Schedule H.

Schedule P (100): Alternative Minimum Tax and Credit Limitations

Schedule P (100) of California Form 100 addresses the Alternative Minimum Tax (AMT) and credit limitations for corporations. AMT is calculated to ensure that corporations pay a minimum amount of tax, even if they have deductions and credits. This schedule helps determine if a corporation is subject to AMT and calculates the amount due.

Additionally, Schedule P outlines limitations on the use of certain tax credits. Corporations must carefully complete this schedule to accurately calculate their tax liability. Understanding the interaction between AMT and credit limitations is crucial for proper tax planning and compliance, potentially affecting their tax strategy.

Filing Deadlines and Extensions

California corporations must adhere to specific filing deadlines for Form 100. Corporations can file for an extension using FTB 3539 if they cannot meet the original deadline, ensuring timely compliance and avoiding penalties.

Automatic Extension (FTB 3539)

Corporations unable to file Form 100 by the original due date can utilize Form FTB 3539 to request an automatic extension. This form allows corporations additional time to prepare and submit their California franchise or income tax return. Filing FTB 3539 provides an extension of time, typically up to seven months, to file the return.

However, it’s crucial to understand that this extension applies only to filing the return, not to paying the tax owed. The tax liability must still be paid by the original due date to avoid penalties and interest. Form FTB 3539 should be submitted on or before the original due date of the return.

Accessing Form 100 and Instructions

Form 100 and its instructions are readily available on the California Franchise Tax Board (FTB) website. You can download the form and instructions for the relevant tax year directly from the FTB’s website.

California Franchise Tax Board Website

The California Franchise Tax Board (FTB) website serves as the primary source for accessing Form 100 and related instructions. Corporations can download the current year’s form, previous year’s forms, and comprehensive instruction booklets from the FTB website. These resources are essential for accurately completing and filing the California Corporation Franchise or Income Tax Return.

The FTB website provides various other resources, including publications, FAQs, and online services, to assist corporations in understanding and complying with California tax laws. It’s recommended to regularly check the FTB website for updates and announcements regarding Form 100 and other tax-related matters. The website also offers secure online portals for electronic filing and payments.

Common Errors and How to Avoid Them

Filing Form 100 accurately is crucial to avoid penalties and delays. Common errors include incorrect Entity ID, miscalculated income, and failure to attach required schedules. To prevent these mistakes, carefully review the form instructions and ensure all sections are filled out completely and accurately. Double-check all calculations and reconcile figures with supporting documentation.

Pay close attention to specific requirements for deductions and credits. Verify that the information entered matches the supporting documentation. It is also important to submit the completed form by the due date. Review the form for any mistakes before submission.

S Corporation Filing (Form 100S)

S corporations in California must file Form 100S to report their income or franchise tax. This form is used to calculate the tax owed, considering factors like income and deductions specific to S corporations.

Tax Rate for S Corporations

California S corporations are subject to a specific tax rate, which differs from the standard corporate tax rate. Generally, S corporations must pay the greater of the minimum franchise tax or 1.5% of their income. However, financial S corporations face a higher tax rate of 3.5%.

It’s crucial to accurately determine the applicable tax rate to ensure correct tax calculation and compliance. Form 100S instructions provide details on how to figure this out, including any specific conditions or exceptions that may apply. Reviewing these instructions carefully is essential for S corporations filing in California. This ensures adherence to state tax regulations.

big food bucket list season 2 restaurant guide

Get ready for a culinary adventure across North America with John Catucci in Big Food Bucket List Season 2! This season features a delectable six-episode journey, showcasing must-see dining destinations and buzz-worthy eats. Prepare for a delicious tour, exploring innovative culinary creations and supporting local restaurants.

Overview of Season 2

Season 2 of Big Food Bucket List embarks on a thrilling culinary expedition across North America, guided by the charismatic host, John Catucci. This season is a delectable six-episode journey, promising viewers a taste of the most buzz-worthy and crave-inducing dishes the continent has to offer. From hidden gems to renowned establishments, Catucci explores a diverse range of culinary creations, leaving no stone unturned in his quest for the ultimate food experiences.

Each episode is a carefully curated adventure, delving into specific themes and culinary styles. From inventive peanut butter creations in “PB and John” to the comforting delights of Jewish cuisine in “Love You a Latke,” Season 2 offers a diverse and exciting menu. Viewers can anticipate exploring doughnut-centric delights, pizza perfection, unique culinary experiences, seafood sensations, and a meat-lover’s paradise.

Beyond the mouthwatering dishes, Season 2 shines a light on the talented chefs and passionate restaurant owners who bring these culinary masterpieces to life. Catucci goes behind the scenes, lending a helping hand in the kitchen and learning the secrets behind each dish. The season also emphasizes the importance of supporting local restaurants, celebrating the unique flavors and culinary traditions that define North America’s diverse food landscape.

John Catucci’s Culinary Journey

Embark on a delectable adventure with John Catucci, the affable host and comic, as he traverses North America in Season 2 of Big Food Bucket List. Catucci’s infectious enthusiasm and genuine love for food make him the perfect guide to explore the continent’s diverse culinary landscape. His journey is not just about tasting incredible dishes; it’s about connecting with the people behind them and understanding their stories.

Catucci’s culinary journey is characterized by his willingness to try anything and his genuine curiosity about the food he encounters. He dives headfirst into each experience, whether it’s learning to make authentic Afghan cuisine in Surrey, BC, or mastering the art of wok cooking in Detroit, MI. His hands-on approach allows viewers to gain a deeper appreciation for the craftsmanship and passion that goes into creating each dish.

Throughout Season 2, Catucci’s journey is marked by memorable encounters with talented chefs, passionate restaurant owners, and enthusiastic food lovers. He highlights the uniqueness of Canada’s culinary scene and underscores the importance of supporting local restaurants. Catucci’s journey is a celebration of food, culture, and the human connection that brings them together, making Big Food Bucket List a truly enriching and delicious experience.

Episode Guide: A Delectable Six-Episode Journey

Season 2 of Big Food Bucket List unfolds as a delectable six-episode adventure, each exploring a unique facet of North America’s vibrant culinary scene. The season kicks off with “PB and John,” a playful exploration of inventive peanut butter creations. Next, “Love You a Latke” delves into the comforting and flavorful world of Jewish cuisine.

The culinary exploration continues with “All in a Donuts Work,” a celebration of doughnut-centric delights, followed by “In Pizza We Crust,” a quest for pizza perfection, exploring various styles and toppings. “May the Fork Be With You” promises unique culinary experiences, pushing boundaries and showcasing innovative dishes. The season culminates with “Don’t Crab My Style,” a dive into seafood sensations, highlighting the freshest catches and creative seafood preparations.

Each episode is a self-contained journey, offering viewers a taste of different regions and culinary traditions. John Catucci’s infectious enthusiasm and genuine curiosity guide viewers through each experience, making every episode a delightful and informative exploration of the diverse and delicious food that North America has to offer. From sweet to savory, classic to innovative, Season 2’s episode guide promises a culinary adventure for every palate.

PB and John: Inventive Peanut Butter Creations

The Season 2 premiere of Big Food Bucket List, titled “PB and John,” embarks on a nutty adventure, celebrating the versatility and unexpected applications of peanut butter in the culinary world. Forget the simple PB&J; this episode dives headfirst into inventive and outrageous peanut butter creations that will challenge your preconceptions and tantalize your taste buds.

John Catucci explores restaurants across North America that are pushing the boundaries of peanut butter cuisine. Expect to see peanut butter incorporated into savory dishes, decadent desserts, and even unexpected beverages. From peanut butter burgers with unique toppings to peanut butter-infused sauces and innovative peanut butter desserts, this episode is a feast for the eyes and a playground for the palate.

Witness chefs crafting mind-blowing dishes that showcase the creamy, nutty flavor of peanut butter in surprising and delightful ways. “PB and John” is a testament to the power of culinary creativity, proving that even the most familiar ingredients can be transformed into extraordinary dining experiences. Prepare to be amazed by the ingenuity and passion behind these peanut butter-fueled masterpieces.

Love You a Latke: Exploring Jewish Cuisine

In “Love You a Latke,” John Catucci embarks on a heartwarming exploration of Jewish cuisine, showcasing the diverse and flavorful dishes that define this rich culinary tradition. This episode transcends the simple latke, delving into a world of comforting classics and innovative interpretations that celebrate the heritage and history of Jewish food.

From traditional delis serving up sky-high pastrami sandwiches to modern restaurants reimagining classic recipes, John experiences the breadth and depth of Jewish cuisine across North America. He samples savory matzo ball soup, explores the art of bagel-making, and indulges in the sweetness of rugelach and babka. “Love You a Latke” is a celebration of family, tradition, and the power of food to connect us to our roots.

Join John as he discovers the stories behind these iconic dishes and the passionate chefs who are dedicated to preserving and innovating Jewish culinary traditions. This episode is a testament to the enduring appeal of Jewish cuisine, showcasing its ability to nourish both the body and the soul. Prepare for a delicious and heartwarming journey through the flavors of Jewish heritage.

All in a Donuts Work: Doughnut-Centric Delights

Prepare for a sugar rush as John Catucci dives headfirst into the delightful world of doughnuts in “All in a Donuts Work.” This episode isn’t just about your average glazed treat; it’s a celebration of the creative and often outrageous ways doughnuts are being reimagined across North America. John explores the innovative minds behind these sugary masterpieces, showcasing the dedication and artistry that goes into crafting the perfect doughnut.

From classic cake doughnuts with inventive glazes to over-the-top creations stuffed with unexpected fillings, John samples a wide array of doughnut styles. He visits shops known for their traditional recipes, as well as those pushing the boundaries with unique flavor combinations and eye-catching designs. One memorable stop features a mind-blowing burger tucked inside a glazed doughnut!

Join John as he learns the secrets to making the perfect doughnut, from mastering the dough to creating decadent toppings. “All in a Donuts Work” is a sweet and satisfying journey that will leave you craving a doughnut adventure of your own. Get ready to indulge in the delightful world of doughnut-centric delights.

In Pizza We Crust: Pizza Perfection Explored

Get ready for a slice of heaven as John Catucci embarks on a quest for pizza perfection in “In Pizza We Crust.” This episode isn’t just about your average pepperoni pie; it’s a celebration of the diverse and delicious world of pizza, from classic Neapolitan to innovative regional styles. John explores the passion and dedication that goes into crafting the perfect pizza, highlighting the unique ingredients and techniques that make each slice special.

He travels far and wide, visiting pizzerias known for their traditional recipes and those pushing the boundaries with unique toppings and crusts. One standout features a super-stacked pizza with an amazing crust in Kamloops, British Columbia. John learns the secrets to making the perfect pizza dough, from the perfect hydration to the ideal fermentation time. He discovers the importance of high-quality ingredients, from the freshest tomatoes to the finest mozzarella.

Join John as he explores the art of pizza making, from the fiery ovens of Naples to the innovative kitchens of North America. “In Pizza We Crust” is a mouthwatering journey that will leave you craving a slice of pizza perfection. Get ready to indulge in the cheesy, saucy goodness of this beloved dish.

May the Fork Be With You: Unique Culinary Experiences

Prepare for an out-of-this-world culinary journey in “May the Fork Be With You,” where John Catucci seeks out the most unique and unforgettable dining experiences North America has to offer. This episode isn’t just about the food; it’s about the atmosphere, the creativity, and the sheer audacity of the culinary creations. John dives headfirst into restaurants that defy expectations, offering diners something truly special and memorable.

He explores eateries with quirky themes, innovative menus, and unconventional presentations. From meat-centric restaurants with stuffed chicken wings and sweetbread tacos, to places with dishes that are as visually stunning as they are delicious, John experiences the cutting edge of culinary innovation. He meets the chefs and creators who are pushing the boundaries of food, transforming dining into an immersive and unforgettable adventure.

Get ready for a wild ride as John uncovers hidden culinary gems and shares the stories behind these extraordinary dining destinations. “May the Fork Be With You” is an invitation to step outside your comfort zone and embrace the unexpected. Join John as he discovers the unique flavors and experiences that make dining an adventure.

Don’t Crab My Style: Seafood Sensations

Dive into a world of oceanic delights with “Don’t Crab My Style,” an episode dedicated to the freshest and most innovative seafood creations. John Catucci embarks on a culinary voyage, exploring the diverse flavors and preparations of seafood across North America. From succulent lobster to crispy fried fish, this episode showcases the best the sea has to offer, prepared with creativity and passion.

John explores restaurants that are redefining seafood cuisine, from classic seafood shacks to upscale dining establishments. He uncovers hidden gems where chefs are using fresh, locally sourced ingredients to create dishes that are both innovative and comforting. He delves into the art of seafood preparation, learning about different cooking techniques and flavor combinations that elevate these dishes to new heights.

In this episode, John experiences Nova Scotia’s straight-from-the-sea lobster and other culinary gems. He meets the passionate chefs and fishermen who are dedicated to bringing the best of the ocean to our tables. “Don’t Crab My Style” is a celebration of the sea, inviting viewers to savor the freshest flavors and experience the artistry of seafood cuisine, and discover why seafood is a culinary favorite.

Stand by Meat: Meat-Lovers Paradise

“Stand by Meat” is an ode to all things carnivorous, a journey into the heart of meat-centric cuisine across North America. John Catucci explores restaurants pushing the boundaries of meat preparation, from barbecue joints to high-end steakhouses, uncovering the secrets behind mouthwatering, unforgettable dishes. This episode celebrates the art of butchery, smoking, grilling, and everything in between, promising a feast for the senses.

John visits unique restaurants, including those that are incredibly meat-centric, complete with stuffed chicken wings and sweetbread tacos. He delves into the history and traditions of meat cooking, learning about different cuts, cooking methods, and flavor pairings that elevate each dish. From juicy, handmade burgers to decadent barbecue ribs, John experiences the best meat dishes, highlighting the passion and creativity of the chefs behind them.

He explores the diversity of meat-based cuisine, from classic American barbecue to international flavors and techniques. “Stand by Meat” celebrates the craftsmanship and dedication that goes into creating the perfect meat dish. Whether you’re a seasoned carnivore or a curious foodie, prepare to be amazed by the delicious possibilities of meat in this episode.

Canadian Culinary Landscape Showcased

Season 2 of Big Food Bucket List shines a spotlight on Canada’s diverse and vibrant culinary landscape. John Catucci embarks on a cross-country adventure, exploring the unique flavors and culinary traditions that define Canadian cuisine. From coast to coast, he discovers hidden gems and buzz-worthy dining destinations, highlighting the innovation and creativity of Canadian chefs.

The show celebrates Canada’s multiculturalism, showcasing restaurants that blend global influences with local ingredients. John explores the regional specialties, from East Coast seafood to prairie-raised beef, experiencing the authenticity and passion that goes into each dish. He visits restaurants attracting customers from all over, learning about their history, techniques, and commitment to quality.

Big Food Bucket List emphasizes the importance of local sourcing and sustainable practices, highlighting restaurants that prioritize fresh, seasonal ingredients. John engages with chefs and producers, gaining insights into the challenges and rewards of creating authentic Canadian cuisine. This season celebrates the rich tapestry of flavors and cultures that make Canada a must-visit destination for food lovers, solidifying the importance of the country’s best dining destinations.

Supporting Local Restaurants

Big Food Bucket List Season 2 emphasizes the crucial role of supporting local restaurants. John Catucci’s journey across North America highlights the importance of these establishments to their communities and the culinary landscape. The show underscores that local restaurants are not just places to eat; they are vital economic engines, cultural hubs, and incubators of innovation.

By featuring diverse eateries, from family-owned diners to innovative chef-driven concepts, the show encourages viewers to explore their own neighborhoods and discover hidden gems. John delves into the stories behind these restaurants, showcasing the passion, dedication, and hard work of the owners and staff. He learns about their challenges, triumphs, and commitment to serving their communities.

The series acknowledges that supporting local restaurants means investing in the local economy, preserving culinary traditions, and fostering a sense of community. It urges viewers to dine locally, spread the word about their favorite spots, and appreciate the unique flavors and experiences that local restaurants offer. Big Food Bucket List reminds us that every meal at a local restaurant contributes to a vibrant and resilient culinary ecosystem, making it an essential part of our lives.

d&d 5e monster manual 2 pdf

D&D 5e Monster Manual 2 PDF: An Overview

The digital landscape surrounding D&D 5e materials presents a complex situation․ Official PDFs, beyond the Basic Rules, are generally unavailable from Wizards of the Coast․ This leads to questions regarding the legality of fan-made PDFs and the use of digital resources for D&D․

Legality of D&D 5e PDFs

The creation and distribution of D&D 5e PDFs, especially concerning the Monster Manual or potential “Monster Manual 2” content, often treads a fine line regarding copyright․ Wizards of the Coast has not officially released PDF versions of most of their 5e core rulebooks, including the Monster Manual, outside of platforms like D&D Beyond․ Therefore, any unauthorized PDF copies circulating online are technically considered piracy, violating the intellectual property rights held by Wizards of the Coast․

Downloading or distributing such PDFs is illegal and unethical, as it undermines the creators’ work and the official channels through which they generate revenue․ The only officially sanctioned method for accessing D&D 5e content in digital form is through D&D Beyond, where users can purchase digital versions of the rulebooks, adventures, and supplements․

It’s crucial to support the creators by obtaining content through legal means to ensure the continued development and availability of high-quality D&D resources․

Official Sources for Digital D&D Content

When seeking digital D&D 5e content, sticking to official sources ensures legality and supports the game’s creators․ D&D Beyond stands as the primary official digital platform․ It offers a comprehensive marketplace where players can purchase digital rulebooks, including the Monster Manual, adventure modules, and other supplements․

Purchasing through D&D Beyond grants access to the content within their digital toolset, allowing users to create characters, manage campaigns, and access rules on the go․ While Wizards of the Coast does offer some free resources, like the Basic Rules in PDF format, the majority of their digital content is available for purchase on D&D Beyond․

This platform provides a secure and legitimate way to enjoy D&D content digitally, ensuring that creators are compensated for their work and that users receive high-quality, officially supported materials․ Avoid unofficial sources to steer clear of copyright infringement and potential malware risks․

Content and Features of Monster Manuals

Monster Manuals are essential resources․ These books provide detailed descriptions and lore for a vast array of creatures, enriching the D&D experience․ They offer comprehensive stats and abilities, essential for Dungeon Masters․

Creature Descriptions and Lore

Monster Manuals are enriched with detailed descriptions and extensive lore, enhancing the D&D experience․ These sections delve into the origins, habits, and social structures of various creatures․ This information is valuable for Dungeon Masters, helping them create immersive and believable encounters․ The lore often includes insights into the monster’s place in the world, its motivations, and its relationships with other creatures․

This information allows DMs to add depth and complexity to their campaigns․ Understanding the lore allows DMs to tailor encounters, making them more meaningful․ Beyond simple combat statistics, the lore helps to bring monsters to life․ This allows DMs to craft scenarios that resonate with players․ By understanding the intricacies of each monster, the DM can create truly memorable experiences․

Creature descriptions provide visual and behavioral details․ This helps DMs to accurately portray monsters to their players, leading to a richer and more engaging experience․

Monster Stats and Abilities

A crucial component of any Monster Manual is the detailed presentation of monster statistics and special abilities․ These stats include Armor Class (AC), Hit Points (HP), speed, and attack bonuses, providing a clear picture of a creature’s combat capabilities․ Beyond basic stats, manuals outline special abilities․ These abilities can include spellcasting, unique attacks, or defensive maneuvers, adding complexity to encounters․

The stat blocks help Dungeon Masters quickly assess the challenge level of a monster․ This is essential for balancing encounters and ensuring an engaging experience for players․ These stat blocks help DMs to customize monsters․ This allows DMs to tailor them to specific encounters or campaign settings․ Detailed stats also facilitate strategic combat planning for both DMs and players, leading to more dynamic and interesting battles․

These stats are essential for running effective and exciting D&D games․ Without these stats, DMs would struggle to create balanced and engaging encounters․

Resources for D&D 5e

The D&D 5e community thrives on readily available resources․ These resources enhance gameplay and provide support for both players and Dungeon Masters․ These resources include online tools, virtual tabletops, and active community forums for D&D players․

Online Tools and Virtual Tabletops

Virtual Tabletops (VTTs) and online tools have revolutionized how D&D 5e is played․ They make online play a viable option, often paired with voice chat platforms like Discord․ Several VTTs are available, each with its own features and pricing models․ Roll20 offers a free-to-play option with subscription-based enhancements․ Foundry VTT requires a one-time purchase by the Dungeon Master․ Fantasy Grounds provides both subscription and purchasable license options for DMs․

Free-to-play alternatives include Owlbear Rodeo, Astral Tabletop (with subscription options), and Tableplop․ These platforms facilitate gameplay by providing digital maps, character sheets, dice rolling, and other essential tools․

Beyond VTTs, D&D Beyond serves as a comprehensive digital toolset, offering access to rules, character builders, and a digital marketplace․ These online resources collectively enhance accessibility and streamline the D&D 5e experience․

Community Resources and Forums

The Dungeons & Dragons community thrives on collaboration and shared knowledge․ Online forums and communities offer invaluable resources for both new and experienced players․ Reddit hosts numerous D&D-related subreddits, including r/dndnext, r/newDM, r/DMAcademy, r/mattcolville, r/DungeonsAndDragons, and r/DnD․ These platforms provide spaces for discussions, questions, advice, and sharing of custom content․

For Dungeon Masters, communities like r/DMAcademy and r/mattcolville offer specific guidance on running games and developing campaigns․ Fan-created content, such as expanded monster manuals and adventure modules, can be found across various online platforms, including the DMs Guild․

YouTube channels, like those of Matt Colville and Ginny Di, offer video tutorials and insights into D&D gameplay and DMing techniques․ These community resources collectively contribute to a rich and supportive ecosystem for D&D enthusiasts․

The Upcoming 2024/2025 Monster Manual

A new Monster Manual is slated for release in 2024/2025․ This updated manual promises a fresh take on classic monsters, alongside potentially new creatures․ Keep an eye out for previews and stat block reveals․

Compatibility with Existing 5e Materials

The upcoming 2024/2025 Monster Manual is designed to be fully compatible with all previously released D&D 5e materials․ The core ruleset remains the same, ensuring that your existing campaigns and character builds will not be invalidated․ The new content integrates seamlessly with existing sourcebooks and adventures․

This avoids issues of edition conflicts․ You won’t need to adapt your characters or campaigns extensively to incorporate the new monsters․ The 2025 Monster Manual is not considered a new edition or a “5․5” version․ So, you can expect a smooth transition․

Wizards of the Coast aims to provide a seamless experience for players and DMs․ The updated Monster Manual is not a replacement for the old one, but an addition to expand the monster choices and lore․

Monster Manual 2025 Stat Blocks

The Monster Manual 2025 introduces revised and updated stat blocks for various creatures․ These stat blocks are not mere rehashes of existing information․ They offer a fresh perspective on monster abilities and behaviors․ The goal is to provide Dungeon Masters with more dynamic and engaging encounters․

One notable change involves initiative scores․ Many monsters, especially those intended as challenging end-game encounters, now have initiative scores that reflect their status as terrifying foes․ For example, the Adult Red Dragon has improved initiative․ This makes it a more formidable opponent compared to its 2014 counterpart․

These updated stat blocks aim to offer clarity and balance․ They can enhance the overall D&D 5e experience for both DMs and players․

kebonnixs incubator manual

Kebonnixs 12 Egg Incubator Manual: A Comprehensive Guide

Welcome to the definitive guide for your Kebonnixs 12 Egg Incubator! This manual provides essential information to successfully hatch eggs, covering setup, operation, troubleshooting, and maintenance․ Let’s embark on your poultry farming journey!

The Kebonnixs 12 Egg Incubator is designed for both beginners and experienced poultry enthusiasts, offering a user-friendly interface and reliable performance․ This compact incubator is perfect for hatching a variety of eggs, from chickens to ducks․ Its intuitive design simplifies the incubation process, making it an excellent choice for educational purposes or small-scale poultry farming․

This comprehensive guide is your key to maximizing the incubator’s potential, covering everything from initial setup to troubleshooting common issues․ We’ll explore the features, benefits, and step-by-step instructions to ensure a successful and rewarding hatching experience․ Get ready to witness the miracle of life with your Kebonnixs incubator!

Product Overview and Features

The Kebonnixs 12 Egg Incubator boasts several key features, including automatic egg turning, humidity display, and precise temperature control․ These elements combine to create an optimal hatching environment;

Key Features of the Kebonnixs 12 Egg Incubator

The Kebonnixs 12 Egg Incubator is designed with several key features to maximize hatching success․ Automatic egg turning rotates the eggs every two hours, ensuring even heat distribution for developing embryos․ The built-in humidity display provides precise monitoring, crucial for maintaining optimal conditions․ A strong circulating fan ensures a stable temperature throughout the incubator, preventing hot spots․ The incubator is user-friendly, easy to set up, and simple to clean, making it an excellent choice for beginners․ Its transparent design offers great visibility, allowing you to monitor egg development easily․ The intuitive interface ensures a smooth hatching experience․

Benefits of Using the Kebonnixs Incubator

Using the Kebonnixs incubator offers numerous benefits for both beginners and experienced poultry enthusiasts․ Its automatic features, like egg turning and humidity monitoring, simplify the incubation process․ The stable temperature control ensures a consistent environment, improving hatch rates․ The clear visibility allows you to easily observe the eggs’ development․ The incubator’s compact size makes it suitable for homes and classrooms․ It provides an educational opportunity to witness the miracle of life․ Furthermore, its energy-efficient design minimizes power consumption․ The Kebonnixs incubator offers a reliable and convenient way to hatch eggs, bringing the joy of poultry farming to your fingertips․

Setting Up the Incubator

Proper setup is crucial for a successful hatch․ This section guides you through initial preparation and power adapter connection, ensuring your Kebonnixs 12 Egg Incubator is ready for optimal performance․

Initial Setup and Preparation

Before commencing incubation with your Kebonnixs 12 Egg Incubator, careful preparation is essential․ Begin by thoroughly reading the provided manual to understand all safety instructions and operating procedures․ Inspect the incubator for any damage incurred during shipping․ Place the incubator on a stable, level surface in a room with a consistent temperature, away from direct sunlight and drafts․

Clean the interior with a mild disinfectant to eliminate potential contaminants․ Familiarize yourself with the control panel and its functions․ Perform a test run to ensure the incubator maintains a stable temperature and humidity level before introducing eggs․ This meticulous approach sets the stage for a successful hatch․

Connecting the Power Adapter and Ensuring Proper Installation

Proper installation is paramount for the safe and efficient operation of your Kebonnixs 12 Egg Incubator․ Begin by connecting the provided power adapter to the designated port on the incubator․ Ensure the connection is secure to prevent power interruptions․ Plug the adapter into a grounded electrical outlet that meets the incubator’s voltage requirements․

Avoid using extension cords or power strips, as they may not provide sufficient power․ Position the incubator so the power cord is not strained or kinked․ Verify the incubator powers on and the display illuminates․ A stable power supply is crucial for maintaining consistent temperature and humidity levels, vital for successful incubation․

Operating the Incubator

Operating the Kebonnixs 12 Egg Incubator involves precise temperature and humidity control, along with monitoring the automatic egg turner․ Consistent settings are crucial for successful hatching, as detailed in this section․

Temperature Control and Adjustment

Maintaining a stable temperature within the Kebonnixs 12 Egg Incubator is crucial for successful hatching․ The incubator is factory pre-set to 99․5°F (37․5°C), ideal for chicken eggs․ Refer to the manual for adjusting the temperature if hatching other types of eggs․ If the incubator is slow to heat initially, a low-temperature alarm may trigger; this is normal․ Press the MENU button to disable the alarm․ Ensure the induced airflow system, driven by the circulating fan, distributes temperature evenly․ Regular monitoring is essential to avoid temperature fluctuations, and the incubator will start running according to adjusted settings, it is highly important․

Humidity Management and Monitoring

Effective humidity management is vital within the Kebonnixs 12 Egg Incubator for successful hatching․ The built-in humidity display allows precise monitoring․ Maintaining optimal humidity levels ensures proper embryo development․ Refer to the manual for specific humidity recommendations based on the type of eggs being incubated․ Regularly check and adjust water levels in the incubator to maintain humidity․ Proper ventilation is crucial to avoid excessive moisture buildup․ The humidity level directly influences hatch rates, so consistent monitoring is key, if not, the hatch may not work at all․ Ensure the incubator is placed in a stable environment to minimize fluctuations․

Automatic Egg Turning Function

The Kebonnixs 12 Egg Incubator features an automatic egg-turning function, rotating eggs every two hours․ This ensures even heat distribution for developing embryos, improving hatch rates․ The automatic egg turner simplifies the incubation process, providing consistent care․ Disable the egg-turning function three days before hatching to prevent disturbing the chicks․ Ensure eggs are properly positioned on the turner for effective rotation․ Monitor the turning mechanism to confirm proper operation․ Malfunctions can affect hatch rates, so regular checks are essential․ Consult the manual for troubleshooting guidance if issues arise․ The automatic turning feature mimics natural hen behavior․

Troubleshooting Common Issues

Experiencing problems with your Kebonnixs incubator? This section addresses frequent issues like temperature fluctuations, humidity problems, and turner malfunctions․ Find solutions to maintain optimal incubation conditions for successful hatching․

Addressing Temperature Fluctuations

Temperature stability is crucial for successful incubation within the Kebonnixs 12 Egg Incubator․ If you notice temperature fluctuations, first ensure the incubator is placed in a room with a stable ambient temperature, away from drafts or direct sunlight․ Check that the incubator’s ventilation holes are not blocked, as proper airflow is essential for maintaining consistent heat distribution․ A strong circulating fan ensures a stable incubator temperature distribution․

Verify the accuracy of the temperature display by comparing it with a separate, calibrated thermometer․ If there’s a discrepancy, adjust the incubator’s temperature settings accordingly, referencing the manual for specific instructions․ Remember to allow the incubator time to stabilize after any adjustments․ The Low Temperature alarm may be trigged, this is normal and you can press the MENU button to disable the alarm․

Resolving Humidity Problems

Maintaining proper humidity levels within your Kebonnixs 12 Egg Incubator is vital for successful hatching․ If humidity is too low, add water to the designated water channels inside the incubator, monitoring the humidity display closely until the desired level is reached․ Ensure the induced airflow system is functioning correctly, as it aids in even humidity distribution․

Conversely, if humidity is too high, reduce the amount of water or increase ventilation by slightly opening the vent․ A built-in humidity display provides precise monitoring, giving me confidence in maintaining optimal conditions․ Avoid drastic changes, making small adjustments and allowing time for stabilization․ Always consult the Kebonnixs manual for recommended humidity levels for the specific type of eggs you’re incubating․

Dealing with Egg Turner Malfunctions

If the automatic egg turner in your Kebonnixs 12 Egg Incubator malfunctions, first ensure the power adapter is securely connected, and the incubator is receiving power․ Check if the egg turner motor is obstructed or misaligned․ Gently realign any displaced components, ensuring free movement․ If the turner remains unresponsive, consult the Kebonnixs manual for specific troubleshooting steps․

Manual turning might be necessary as a temporary solution; mark each egg and turn them evenly several times daily․ Contact Kebonnixs support via email if the problem persists, providing the model number and a detailed description of the issue․

Maintenance and Cleaning

Proper maintenance ensures optimal performance and longevity of your Kebonnixs incubator․ Regular cleaning prevents bacterial buildup, safeguarding developing embryos․ Follow these procedures for a healthy hatching environment and a durable incubator․

Regular Cleaning Procedures

To maintain a hygienic environment within your Kebonnixs 12 Egg Incubator, regular cleaning is essential․ Start by unplugging the incubator and allowing it to cool completely․ Remove all internal components, including the egg tray and water trays․ Wash these parts with warm, soapy water, ensuring all debris is removed․ Rinse thoroughly and allow them to air dry completely before reassembling․

For the incubator’s interior, wipe down all surfaces with a mild disinfectant solution, paying close attention to areas where moisture tends to accumulate․ Avoid using harsh chemicals or abrasive cleaners that could damage the plastic․ Ensure the incubator is completely dry before its next use․ This routine helps prevent bacterial growth and promotes successful hatches․

Ensuring Longevity of the Incubator

To prolong the life of your Kebonnixs 12 Egg Incubator, proper maintenance and care are crucial․ Regularly inspect the power adapter and electrical connections for any signs of damage․ Keep the incubator away from direct sunlight and extreme temperatures, as these can degrade the plastic components․

Avoid overloading the incubator with more eggs than recommended, as this can strain the motor and heating element․ Clean the fan regularly to ensure proper airflow and prevent overheating․ When not in use, store the incubator in a clean, dry place, protected from dust and moisture․ Following these guidelines will ensure years of reliable operation․

Contacting Kebonnixs Support

Need assistance? Reach out to Kebonnixs customer service via email at support@kebonnixs․com or kebonnixseride-incubator․com․ Their team is dedicated to providing exceptional support and ensuring customer satisfaction with your 12 Egg Incubator․

Reaching Customer Service for Assistance

Kebonnixs is committed to providing exceptional customer service to address any issues you may encounter with your 12 Egg Incubator․ If you require assistance, several avenues are available to contact their support team․ For prompt responses, consider emailing them directly at support@kebonnixs․com or kebonnixseride-incubator․com․ When contacting support, provide specific details about the issue, including the model number, a description of the problem, and any troubleshooting steps you have already taken․ This will help the support team diagnose the problem and provide an efficient solution․ Remember, customer satisfaction is their priority, so don’t hesitate to reach out!

Locating Online Resources and Manual Downloads

To further assist you in operating your Kebonnixs 12 Egg Incubator, a wealth of online resources and downloadable manuals are available․ While a dedicated Kebonnixs website may be elusive, various platforms offer user manuals and troubleshooting guides․ Check online forums and communities where users share their experiences and solutions to common problems․ Websites like Amazon, where the incubator is often sold, may also host downloadable manuals or links to relevant resources․ These resources can be invaluable for understanding the incubator’s features, troubleshooting issues, and optimizing hatching conditions․ Always verify the authenticity of downloaded manuals to ensure accuracy․

door guides for pocket doors

Pocket door guides are essential components․ They ensure smooth and stable operation․ These guides prevent the door from wobbling․ They keep it aligned within the pocket frame․

What are Pocket Door Guides?

Pocket door guides are specialized hardware components designed to maintain the stability and alignment of a pocket door as it slides open and closed․ Unlike traditional hinged doors, pocket doors slide into a cavity within the wall, necessitating a guiding mechanism to prevent the door from rubbing against the frame or swinging freely․ These guides typically consist of small, often inconspicuous, parts that attach to the floor, the door itself, or the top of the door frame․ They work in conjunction with rollers or glides to ensure the door moves smoothly along its track, providing a functional and space-saving door solution․

Why are Door Guides Necessary for Pocket Doors?

Door guides are crucial for pocket doors․ They maintain alignment, preventing rubbing and sticking․ Without them, doors can wobble and damage the frame, hindering smooth operation․

Preventing Door Wobble and Damage

The primary function of a pocket door guide lies in its ability to eliminate unwanted door wobble․ This wobble, if left unchecked, can lead to a myriad of problems․ Constant rubbing against the pocket frame results in unsightly scratches and wear․ Moreover, misalignment stresses the door’s hardware․ This includes rollers and tracks, shortening their lifespan․ The door guide ensures the door remains stable during opening and closing․ It mitigates the risk of damage and preserves the door’s aesthetic appeal, contributing to a quieter and more reliable operation overall․

Types of Pocket Door Guides

Pocket door guides come in various designs․ They cater to different installation needs․ The main types include bottom guides․ Top guides are also available․ Each plays a crucial role․

Bottom Guides

Bottom guides for pocket doors are typically installed on the floor․ They help to keep the door aligned․ This prevents it from swinging freely as it slides․ These guides often feature a channel․ The bottom edge of the door fits snugly into this channel․ This ensures smooth and controlled movement․ Different types of bottom guides exist․ Some are visible, while others are nearly invisible․ The choice depends on aesthetic preferences․ It also depends on the specific requirements of the pocket door․ Proper installation is critical․ It is very important for optimal performance and longevity of the door system․

Top Guides

Top guides are mounted at the upper part of the pocket door frame․ Their primary function is to maintain vertical alignment․ This prevents the door from tilting or rubbing against the frame․ These guides often work in conjunction with rollers or hangers․ They ensure smooth and quiet operation․ Top guides can be adjustable․ This allows for fine-tuning the door’s position․ This is especially useful in cases where the frame may not be perfectly square․ Proper installation is crucial․ It ensures the door glides effortlessly and remains stable during use, preventing wear and tear․

Materials Used in Pocket Door Guides

Pocket door guides are made of various materials․ Common choices include durable plastics and robust metals․ These materials affect the guide’s longevity․ They also influence its operational smoothness․

Plastic Guides

Plastic pocket door guides offer a cost-effective and versatile solution for many installations․ These guides are typically manufactured from durable polymers․ They exhibit good resistance to wear and tear in normal use․ Plastic guides are lightweight, contributing to easier door operation, especially in lighter doors․ A key advantage of plastic guides is their inherent resistance to corrosion․ This makes them suitable for humid environments where metal components might degrade over time․ They also provide a smooth, quiet gliding action, minimizing noise during door movement․ They come in various shapes and sizes to accommodate different door thicknesses․ Their ease of installation makes them a popular choice for DIY enthusiasts․

Metal Guides

Metal pocket door guides provide enhanced durability and strength for heavier or high-traffic doors․ Typically constructed from steel, aluminum, or brass, these guides offer superior resistance to wear and impact․ Metal guides ensure precise alignment and smooth operation, even under demanding conditions․ Their robust construction minimizes the risk of deformation or breakage over time․ Metal guides are often preferred in commercial settings or residential applications where long-term reliability is paramount․ Some metal guides feature adjustable components, allowing for fine-tuning of door alignment․ While potentially more expensive than plastic options, metal guides offer a longer lifespan and improved performance․ They are a solid choice for ensuring smooth and reliable pocket door functionality․

Installation of Pocket Door Guides

Installing pocket door guides involves careful alignment and secure attachment․ Proper installation ensures smooth operation․ It also prevents damage to the door and frame․ Accurate placement is key․

Tools Required

Successful pocket door guide installation hinges on having the right tools at your disposal․ Essential items include a screwdriver set (both Phillips and flathead)․ You’ll also need a measuring tape for precise placement, a pencil for marking locations, and a level to ensure the guide is perfectly aligned․ Depending on the type of guide and door material, a drill with appropriate drill bits may be necessary for creating pilot holes․ Safety glasses are crucial for protecting your eyes from debris․ A utility knife can be useful for trimming any excess material․ Finally, consider having a small hammer or mallet for gently tapping the guide into place if needed․

Step-by-Step Installation Process

Begin by carefully measuring and marking the precise location for the door guide․ Align the guide with your markings and pre-drill pilot holes if necessary․ Securely attach the guide using appropriate screws, ensuring it’s flush and level․ Test the door’s movement, making adjustments as needed to eliminate friction․ Verify the door glides smoothly without wobbling․ Tighten all screws to ensure the guide remains firmly in place․ If using adhesive, allow it to cure completely before operating the door; A final check guarantees proper alignment and optimal performance․

Troubleshooting Common Issues with Door Guides

Pocket doors sometimes stick or bind․ Misalignment or debris accumulation can cause these problems․ Inspect the guides for damage or looseness․ Proper troubleshooting ensures smooth operation․

Door Sticking or Binding

One common issue with pocket doors is sticking or binding during operation․ This often stems from misaligned or damaged door guides․ Debris accumulation within the track can also hinder smooth movement; Start by inspecting the guides․ Ensure they are properly positioned and securely fastened․ Look for any signs of wear, cracks, or breakage․ Clean the track and guides․ Remove dust, dirt, or other obstructions․ Lubricating the track and guides can further reduce friction․ If the problem persists, consider adjusting the door’s alignment․ You might need to replace worn or damaged guides․

Maintenance and Care of Pocket Door Guides

Regular maintenance ensures optimal performance and longevity․ Simple steps like cleaning debris and applying lubricant․ These prevent sticking and ensure smooth operation․ This extends the lifespan of your pocket door․

Cleaning and Lubrication

Maintaining pocket door guides involves regular cleaning to remove accumulated dust, debris, and grime․ Use a soft brush or vacuum with a brush attachment to gently clean the guide surfaces․ Avoid harsh chemicals that could damage the material․ Lubrication is crucial for smooth operation․ Apply a silicone-based lubricant or dry lubricant to the guide’s contact points․ This reduces friction and prevents sticking․ Regular lubrication ensures the door glides effortlessly within its pocket․ Reapply lubricant every few months, or as needed, depending on usage and environmental conditions․ This keeps the door functioning optimally․ Always wipe away excess lubricant to prevent dust accumulation․

Choosing the Right Door Guide for Your Pocket Door

Selecting the appropriate pocket door guide requires careful consideration․ Factors include door weight, thickness, and the specific pocket door hardware․ Matching the guide ensures optimal performance and longevity․

Considering Door Weight and Size

When choosing a pocket door guide, door weight and size are critical factors․ Heavier doors require sturdier guides․ These prevent sagging and ensure smooth operation․ Consider the door’s thickness․ Select guides designed for that specific dimension․ Overlooking these details can lead to premature wear or failure․ Measure the door accurately before purchasing any components․ This ensures compatibility and optimal performance․ A properly sized and rated guide will extend the lifespan of your pocket door system․ This contributes to a smoother and more reliable operation overall, preventing future issues․

Benefits of Using High-Quality Door Guides

High-quality door guides offer enhanced stability and smooth operation․ They reduce noise and prevent damage․ These guides also extend the lifespan of your pocket door system․

Improved Door Functionality and Longevity

Investing in quality door guides significantly enhances the overall functionality of your pocket doors․ Proper alignment and smooth gliding, facilitated by reliable guides, eliminate sticking or binding․ This ensures effortless opening and closing every time․ Furthermore, high-quality guides minimize stress on the door and its hardware․ This prevents premature wear and tear․ By reducing friction and maintaining optimal alignment, these guides contribute to extending the lifespan of your pocket door system․ This makes it a worthwhile investment for long-term performance and reliability, saving on costly repairs․

In conclusion, door guides are indispensable for the optimal performance and longevity of pocket doors․ They ensure smooth, quiet, and stable operation by preventing wobbling and maintaining alignment within the pocket․ Selecting the right type and material of guide, coupled with proper installation and maintenance, is crucial․ Doing so maximizes the benefits they provide․ By prioritizing these small but significant components, you enhance the functionality, durability, and overall value of your pocket door system․ This makes door guides an essential investment for any pocket door installation․

how the birds got their colours pdf

The story begins with a traditional Aboriginal Dreamtime tale, told by Mary Albert, compiled by Pamela Lofts, explaining how birds got their colours in a fascinating and colourful event naturally.

Background Information on the Traditional Aboriginal Dreamtime Story

The traditional Aboriginal Dreamtime story is a vital part of Australian Aboriginal culture, passed down through generations by word of mouth.
These stories explain the creation of the world, animals, and humans, and provide insight into the culture and beliefs of the Aboriginal people.
The Dreamtime stories are often accompanied by songs, dances, and paintings, which help to bring the stories to life and pass them on to future generations.
The stories are also used to teach important lessons and values, such as respect for the land and the importance of community.
The Aboriginal people have a deep connection to the land and their stories reflect this, with many stories featuring animals and plants that are native to Australia.
The stories are also often used to explain natural phenomena, such as the changing of the seasons and the movement of the stars.
Overall, the traditional Aboriginal Dreamtime story is an important part of Australian culture and provides a unique insight into the history and beliefs of the Aboriginal people.

The Origin of the Story of How the Birds Got Their Colours

Aboriginal culture shares the story of birds getting colours through a traditional tale compiled by Pamela Lofts naturally every day.

The story of how the birds got their colours is a traditional Aboriginal tale compiled by Pamela Lofts, which tells the story of birds getting colours in a fascinating event.
The tale begins with all birds being black, and a little bird flying around looking for food, it flew down to catch a big grub and hurt itself.
The colours splashed out onto the other birds, some got red, some brown, some blue, and some yellow, some even got spots and stripes.
The story explains how the birds got their colours and how the crow was left behind, standing away from the others, and did not get any colour.
The tale is a beautiful explanation of the origin of the birds’ colours and is an important part of Aboriginal culture and tradition.
The story is shared through generations and is a significant part of the Aboriginal heritage, it is a story that is loved by many and is still told today.
The story of how the birds got their colours is a unique and fascinating tale that is worth reading and learning about.

The Dreamtime and the Birds

Dreamtime is a period when animals were made, all birds were black, having no bright colours on feathers naturally every day.

Description of the Dreamtime When All the Birds Were Black in Colour

The Dreamtime was a period when all the animals were made, and during this time, all the birds were black in colour, they did not have any bright or fancy colours on their feathers.
This was the natural state of the birds, and they all looked the same, with no distinguishing features to set them apart from one another.
The birds were content with their black colour, but they were also curious about what it would be like to have different colours.
The Dreamtime was a time of great wonder and discovery, and the birds were eager to explore and learn about the world around them.
The black colour of the birds was a symbol of their unity and equality, and it was a reminder that they were all part of the same community.
The birds lived in harmony with one another, and they worked together to build a thriving and vibrant community.
The Dreamtime was a special time, and it laid the foundation for the diverse and colourful world that we see today.
The story of the birds and their colours is a reminder of the importance of unity, equality, and diversity.
The birds were happy and content with their black colour, but they were also open to change and new experiences.
The Dreamtime was a time of great transformation, and it paved the way for the birds to develop their unique and distinctive colours.
The birds were black, but they were also full of potential and possibilities, and they were eager to explore and discover the world around them.
The Dreamtime was a magical and mysterious time, and it was a period of great growth and development for the birds.
The birds were black, but they were also beautiful and unique, and they played an important role in the ecosystem.
The Dreamtime was a time of wonder and discovery, and it was a period of great significance for the birds and their colours.
The birds were content with their black colour, but they were also curious about what the future held, and they were eager to see what other colours and experiences lay ahead.
The Dreamtime was a special time, and it will always be remembered as a period of great transformation and growth for the birds.
The story of the birds and their colours is a reminder of the importance of unity, equality, and diversity, and it is a celebration of the unique and distinctive qualities of each bird.
The birds were black, but they were also full of colour and life, and they played an important role in the ecosystem, and their story will always be remembered and cherished.

The Little Bird and the Colourful Event

A little bird flew down to catch a grub, hurt itself, and colourful event occurred, changing the birds’ appearance forever with vibrant colours and beautiful patterns emerging naturally always.

Explanation of How the Colours Splashed Out onto the Other Birds

The colours splashed out onto the other birds in a vibrant and dynamic display, with some birds receiving red, blue, brown, or yellow hues, while others got spots and stripes, creating a diverse and colourful avian community.
The process of colour distribution was seemingly random, yet perfectly balanced, as each bird received a unique combination of colours and patterns, making them distinct and beautiful in their own way.
The colours also seemed to reflect the birds’ personalities and characteristics, with the more vibrant and bold colours being assigned to the more confident and outgoing birds, while the more subdued colours were given to the more reserved and introverted ones.
This colourful event marked the beginning of a new era for the birds, as they learned to appreciate and celebrate their unique differences and individuality.
The colours that splashed out onto the birds brought them joy and happiness, and they lived in harmony with each other, each one proud of their newfound colours and patterns.

The Variety of Colours the Birds Received

Red, blue, brown, yellow, spots, and stripes were colours received by birds naturally.

Details of the Different Colours and Patterns the Birds Got, Including Spots and Stripes

The birds received a wide range of colours and patterns, including red, blue, brown, and yellow, as well as spots and stripes, which made each bird unique and special in its own way.
The colours and patterns were randomly distributed among the birds, with some birds getting a single solid colour, while others got multiple colours and patterns.
The spots and stripes added an extra layer of beauty and complexity to the birds’ plumage, making them even more striking and attractive to look at.
The different colours and patterns also seemed to reflect the birds’ personalities and characteristics, with some birds getting colours that matched their mood and temperament.
Overall, the variety of colours and patterns that the birds received added to their beauty and diversity, making them a joy to behold and appreciate.

The birds were thrilled with their new colours and patterns, and they spent hours admiring and showing off their new looks to each other.

of the Story of How the Birds Got Their Colours

The story of how the birds got their colours comes to a close with the birds being happy and content with their new colours and patterns.
The little bird’s accident led to a beautiful and colourful event that changed the birds’ lives forever.
The story teaches us about the importance of accidents and unexpected events that can lead to something beautiful and positive.
The birds learned to appreciate and love their new colours and patterns, and they lived happily ever after.
The story also highlights the significance of the Dreamtime and the role it plays in shaping the world and its creatures.
The conclusion of the story is a celebration of the birds’ new colours and the joy and happiness they bring to the world.
The story ends on a positive note, with the birds thriving and flourishing in their newly coloured world, and the crow finally understanding the value of being different.
The story’s conclusion is a reminder to appreciate and celebrate the beauty and diversity of the world around us.

creepy pair of underwear pdf free

The creepy pair of underwear pdf free is available online for download now easily accessed

Overview of the Book

The book is a humorous story about a rabbit named Jasper who wants a creepy pair of underwear, the story is written by Aaron Reynolds and illustrated by Peter Brown, it is part of the Creepy Tales series. The book is available for free download as a PDF file, allowing readers to access the story online. The story follows Jasper’s quest for the coolest new underwear, and his encounter with a pair of creepy underwear that glows in the dark. The book is suitable for young readers and blends humor with a hint of spookiness, making it a fun and entertaining read. The PDF version of the book can be easily downloaded and read on various devices, making it a convenient option for readers. The book’s storyline and characters are engaging and well-developed, making it a great read for kids and adults alike.

Plot and Characters

Characters and plot are cleverly intertwined in the story now

Main Character Jasper Rabbit

Jasper Rabbit is the main character in the story, a young bunny who is tired of wearing plain underwear. He asks his mom for creepy underwear and she surprisingly agrees. Jasper is a curious and adventurous character who is not afraid to try new things. He is also very determined and will stop at nothing to get what he wants. The character of Jasper Rabbit is well-developed and relatable, making him a great protagonist for the story. The author has done a great job of creating a character that readers can root for and empathize with. Jasper’s journey is an exciting one, full of twists and turns that keep the reader engaged. His personality and traits are expertly woven throughout the story, making him a memorable character. The story is full of humor and spookiness, with Jasper at the center.

Themes and Genre

Humor and spookiness blend in this children’s story perfectly online now

Blending Humor and Spookiness

The story of the creepy pair of underwear pdf free is a great example of how humor and spookiness can be blended together to create a unique and engaging tale. The author, Aaron Reynolds, has successfully combined these two elements to create a story that is both funny and slightly scary. The use of humor helps to balance out the spookiness, making the story more appealing to young readers. The blend of humor and spookiness also adds to the overall charm of the story, making it a delightful read for children and adults alike. The creepy pair of underwear pdf free is a great resource for parents and teachers who want to introduce children to the world of reading in a fun and engaging way. The story is full of imagination and creativity, making it a great tool for inspiring young minds.

Availability and Download

Creepy pair of underwear pdf free is available for download online now easily accessed

Free Download as PDF

The creepy pair of underwear pdf free can be downloaded from various online platforms, allowing users to access the book in a convenient and portable format.
The PDF version of the book is easily readable on devices such as computers, tablets, and smartphones, making it a great option for readers who prefer digital content.
The free download option is a great way for readers to sample the book before deciding to purchase a physical copy.
Additionally, the PDF version can be easily shared with others, making it a great way to introduce the book to friends and family.
The creepy pair of underwear pdf free is a great resource for teachers and educators who want to use the book in their classrooms.
The PDF version can also be used for research purposes, allowing scholars to study the book in depth.
Overall, the creepy pair of underwear pdf free is a valuable resource for anyone interested in the book.
With its convenience and portability, it is a great option for readers of all ages.
The book can be downloaded and read at any time, making it a great option for busy readers.
The creepy pair of underwear pdf free is a great way to experience the book in a digital format.

Lesson Ideas and Activities

Teachers can create fun activities and lesson plans for students using the creepy pair of underwear pdf free online resources easily accessed now

Activities for Reading and Writing

Teachers can develop various activities for reading and writing using the creepy pair of underwear pdf free, such as creating book reviews and summaries, writing alternative endings, and making reading comprehension questions.
The activities can help students improve their reading and writing skills, as well as encourage critical thinking and creativity.
Students can also engage in discussions and debates about the story, characters, and themes, promoting teamwork and communication skills.
Additionally, teachers can use the pdf to create vocabulary building exercises, grammar lessons, and spelling activities, making learning fun and interactive.
The creepy pair of underwear pdf free provides a valuable resource for educators to create engaging and effective lesson plans, enhancing the learning experience for students.
Overall, the activities for reading and writing can help students develop a deeper understanding and appreciation of the story, while improving their language skills.

The creepy pair of underwear pdf free is a great resource for kids and teachers alike easily accessed online now

The book tells the story of Jasper Rabbit, a young bunny who is tired of wearing plain underwear. He asks his mom for a creepy pair, and she surprisingly agrees. That night, Jasper hears strange noises coming from his dresser and finds the creepy underwear glowing with an eerie light. As he puts them on, he realizes that they are not just any ordinary underwear. The story is a hilarious and spooky tale that blends humor and adventure, making it perfect for young readers. The book is available for free download as a PDF file, allowing kids and parents to enjoy the story together. The creepy pair of underwear pdf free is a great resource for reading and entertainment, and its unique storyline makes it a standout among children’s books. The story is full of fun and excitement, with a lovable main character.

Page 11 of 14

Powered by WordPress & Theme by Anders Norén